Fakes in the garden from natural materials. Creating crafts from natural materials in kindergarten. For the manufacture of crafts you will need
craft from natural material kindergarten is a favorite theme of kindergarten and school exhibitions for many teachers, so sooner or later every parent has to face it.
Watch how to make a rose from leaves in the video:
Crafts from cones with their own hands
A very effective craft can be made from cones, a plastic bottle and plasticine:
Funny squirrels are made from cones and felt.

From cones and other natural materials, a mysterious little animal with wings is obtained.

Very cute and funny craft from cones and cotton wool - owls. In order to make owls, we glue the cone scales with glue. Then we push cotton wool between the scales.

Glue over the eyes and nose. We got funny fluffy owls!

From natural materials, you can make very spectacular birds in the nest. From cones and chestnuts we get a head and a body. We make wings from leaves. We fix all parts of the craft with good glue.

It remains to make the birds their house - a nest. We weave it from thin branches, which we fasten with threads. We make the bottom of the nest from intertwined branches that are inserted into the side parts of the craft.

Glue the eyes and beaks on the birds. We have birds in their house. A wonderful craft made from natural materials is ready!

By the winter and the New Year, the craft "Christmas Tree of Cones" will be relevant. We glue a cone from thick cardboard. Using a glue gun, glue the cones to the cone, starting from the bottom row.

We glue the entire cone in this way. Christmas tree made of cones - ready!


Their cones can make a very beautiful tree of happiness - topiary. This craft will take its rightful place at the exhibition of autumn crafts in kindergarten.

Another undoubted winner of the autumn crafts competition is the leaf topiary.

Watch the video on how to make a tree of happiness using paper and natural materials:
Crafts from needles, nuts, acorns and chestnuts
To begin with, we make the body, head and legs of a hedgehog from plasticine. We begin to stick needles into the back of the hedgehog, trying to place them as close to each other as possible.

From the hats of acorns you can make a very spectacular snake.

Acorn and chestnut make a lovely squirrel. The tail and paws of the squirrel are made of fluffy wire. We connect all the details of the craft with glue.

If you fasten the details of the craft with matches, you can make very spectacular animal figurines.

The most skilled craftsmen will be able to make a proud and cheerful deer.

For kindergarten, crafts in a box made of natural materials are popular. Such crafts turn out to be very bright and beautiful - the main thing is to collect more moss, acorns, cones, branches and leaves.

Crafts from pumpkin seeds
Pumpkin seeds are easy to color with regular food coloring. Painted and dried pumpkin seeds become good material for crafts in the mosaic technique.

You can also lay out a bright and beautiful autumn tree.

From cereals you can make a very effective three-dimensional picture. To begin with, we make a sketch with a pencil.

Then we apply glue to a sheet of paper and sprinkle with different cereals. We complement the image with sprigs of greenery, flowers and bark.

Autumn painting from natural materials "Owl"
From natural materials, you can make a luxurious picture "Owl on the branches." To begin with, we take a rectangular cardboard base and glue it around the edges with branches, forming a frame. Now we lay out a tree from the branches inside (you can take one branch that is suitable in shape or fold a tree from several). For gluing we need good glue or glue gun with hot glue.

We draw the outline of an owl on a branch. We apply glue inside the contour and sprinkle the contour well with buckwheat.

Glue the eyes, beak and wings on the owl. We decorate the tree with leaves, and the lower part of the picture with moss. A few cute decoration elements (flowers, insects) will bring liveliness to our autumn crafts.

Autumn painting "Owl" from natural materials
Crafts from vegetables and fruits
Vegetables and fruits are also wonderful material for creativity. See what an amazing zoo you can make from vegetables and fruits.

Eggplant and carrots make a smart penguin with glasses.

Zucchini, eggplant, carrots and cabbage make a real sea frigate.

Ship from zucchini - option number 1
This zucchini boat has strong and beautiful sails made of paper leaves.

Ship from zucchini - option number 2
From zucchini, cabbage and carrots, we can get a very spectacular bunny!

From onions and carrots, you can make chanterelles and seals.

From corn, flowers and berries you can make very beautiful crafts, dedicated to the holiday autumn and harvest.

You can make a hedgehog out of potatoes and berries with the help of toothpicks.

Pink potatoes and carrots make a lovely pig. Ears, patch and legs are fastened with toothpicks.

From these pigs you can assemble a very interesting and educational toy "pig farm".


A very spectacular cockerel is obtained from apples. We fasten the details of the craft with the help of toothpicks.

We can’t ignore the craft, which has already become a classic - “Potato and Carrot Stamps”

How to make such stamps, see the video:
Crafts from stones in the garden
Stones are another great material for creativity in kindergarten. Especially spectacular crafts are obtained from smooth pebbles. By coloring smooth pebbles, you can get our favorite characters, for example, a hedgehog.

If you use glue and connect several stones, you can make funny frogs.

There is nothing more charming than chickens made of rounded pebbles.

For the autumn exhibition, bright fly agaric will certainly come in handy.

Crafts from shells in the garden
Shells are a rare but very favorite material for children to create. See how to make adorable bunnies out of seashells.

From shells, you can glue a cockerel on a stand.

Crafts from branches and sticks
From sticks you can make a very spectacular vase. At the base of the vase plastic bottle. Cut off the top part of it and paint it.

We break off the sticks of medium thickness. Using double-sided tape, glue the sticks to the bottle.

We tie the vase from above and below for strength and beauty with a ribbon. Best of all, an autumn bouquet of leaves, dry branches and cones looks best in a vase of branches.

In a wide and low vase of branches, you can put a bouquet of autumn flowers.

Highly interesting crafts obtained from cut branches.

From the branches you can make beautiful deer. Holes in large branches are made with a drill. Then small branches (legs, neck, horns) are inserted and fixed with glue.

Dry cut sticks can decorate a cardboard house.

See what other wonderful crafts you can make from natural materials:
Turning on the imagination, from the proposed options, you can add up your own, picking up the idea and giving it a unique look.
Greetings to all guests and regular readers of the blog. Recently, I touched on the issue of manufacturing for various competitions and exhibitions in kindergarten and school. I realized that this issue is very relevant, so I decided not to stop and devote a couple more articles on this topic.
However, today we will no longer create from an orange vegetable, but from natural materials, that is, from what can be found in the world around us. Most often for children's creativity they use moss, bark, acorns, leaves, flowers, chestnuts, dry twigs, mushrooms, etc., that is, all plant elements. Of the mineral, shells, sand, shells, stones are well suited.
We will needlework on a specific topic, and on which one, I think you can already guess. Of course, all products should be close to the autumn theme, because I bring the Autumn Festival to all preschool and school institutions.
Do not forget that in addition to organizing all kinds of competitions, matinees are always arranged. Therefore, it's great if you and your child not only work with your hands together, but also memorize a couple. But let's not deviate from the topic and proceed to the selection and creation of crafts.
What crafts from natural material on the theme of autumn can be done with your own hands quickly and beautifully
First, let's understand and figure out what can be done in general. Scrolling through a bunch of different sites, I selected different variants creative works. I note that all of them are still very similar to each other, but at the same time there is something unique in each work.
And here is the first piece. The so-called autumn in the forest. Take a piece of cardboard and cut a circle out of it. Decorate (glue) the imaginary earth with leaves, berries. The house can be built from sticks or paper. In the role of trees, sprigs of a Christmas tree or pine tree work well. Also use log cabins from dried thick branches. Don't forget the stones. Well, plasticine will always help you.

But what kind of house can be made from twigs and colorful autumn leaves. Near the hut, you can settle some fairy-tale hero or forest animal.

Another variation of a house made of cereals and various natural materials. Looks very nice and bright!

How do you like such cute burdock hedgehogs? Well, just a miracle. By the way, about how to make such a craft, you will learn a little lower, it will be detailed master class with descriptions and step by step pictures. So do not rush to leave the page, read everything to the end.

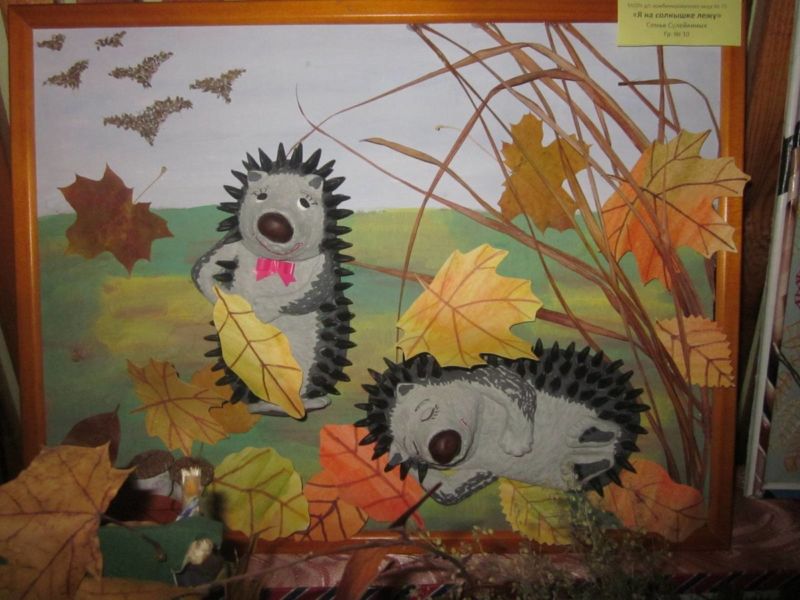
Here's another hedgehog idea. Only here the picture acts as a product. Toddlers can easily cope with this type of activity.

As an addition to any craft, you can use a Barbie doll as the Queen of Autumn. And to make her more elegant, make her out of maple leaves dress.

I really liked the next song. The cone animals are so cute and funny. The work is just class!

From chestnuts you can make any cartoon characters. They perfectly complement the forest clearing.

I don’t know about you, but the photo below really hooked me. So subtly convey all the mood of autumn, it's just a masterpiece.

Hedgehogs, hedgehogs! They are the most popular in crafts made from natural materials, so admire, well, do it yourself.

Forest deer, just handsome. They are made very easily and simply. Connect all the details with brown plasticine.

Another idea is that the cones can be painted and made into whatever you want. Here's what autumn composition turned out.

Ideas for autumn crafts from natural materials for elementary school for the exhibition
In fact, such creativity is very useful, and if your child is carried away by it, then you will then have to prepare natural materials in advance and learn how to properly store them. But of course, this is another topic, today is not about that. Therefore, the following works will help you.
Sailboat option and forest dweller. Simple, but tasteful.

I look, houses are also often found in products. Apparently because they look spectacular and are appropriate in any product.

Here's what I was talking about above. That various animals, fairy-tale and cartoon characters are easily made from natural materials.

What a squirrel who brought a nut. Just a cutie. And for work, you only need cones, acorns, leaves and a stand. Also plasticine.

Well, owls are real. And feathers are also part of natural materials, so do not forget about them.

Now hedgehogs are not from burdock, but from your favorite cones. It also looks great.

For schoolchildren, the following creation is great. It develops imagination, perseverance and accuracy very well.

Here are more works on the theme "Autumn in the forest." I think a lot of people would like to do this on their own.


And finally, these funny puppies who went for a walk. Bravo to their creators! Looks original.

And I want to invite you to watch the following video story. It tells in detail and shows how you can create crafts from natural materials, namely, to make a clearing with mushrooms. Great idea for kids creativity.
Crafts from natural material for the autumn holiday in kindergarten
Now let's see what our kids can do. Yes, actually everything. So all the works are suitable for both schoolchildren and preschoolers. The help of adults, of course, is only welcome and will not be superfluous.
The next work is called "There was a birch in the field." We found a strong birch knot, yellow birch leaves and your tree is ready. In addition, they built a hut from branches, covered the ground with moss, laid out a path with pebbles or cereals, and everything is ready.

Here is a picture in a frame. All the same familiar materials: leaves, grass, plasticine and sunflower seeds.
And how bright ladybug can be obtained from rowan berries. Indescribable beauty!

Do not forget that natural materials go well not only with plasticine, but also with vegetables from the garden. Such cute lamb and pig!

Well, this one is pretty simple. But how a child will be happy with such a creation of his.

And what are these miracles? I think it's Goblin and his girlfriend. A cheerful and romantic composition turned out, do you agree with me?


Remember, just above it was shown closely how you can do forest deer? And now they are not separately, but in a whole composition.

Here and autumn trees look almost like real ones. And cute and prickly hedgehogs are already right there.

And another variation of making a wise owl.

I never tire of being amazed at how rich human imagination is and what our skillful hands are. I say “Bravo!” to the authors of the works.
Interesting do-it-yourself work for grades 1-3 using natural materials
Well, I still have amazing autumn works for you. If you are not tired, then read on and be sure to choose products for creativity with your children.
For example, you can make such a three-dimensional picture. And you can call it like this - Autumn bouquet in a vase.

What do we see below? Wow, a real tree and a superb bunch of leaves. Class!

Oh, I can’t stop, I found another chestnut hut. We have a lot of them in Tula.

And here is a hedgehog without a head and legs). So big and with crops on thorns.

And how beautifully you can decorate a basket from moss and berries! Moreover, the basket itself can also be independently weaved from twigs.

If time permits and there is a forest near you, then wander through it in search of interesting materials for work. You will definitely be lucky and you will find something special, for example, as in the picture below.

By the way, from autumn leaves you can create bouquets of roses. Looks very nice.

Here is another work dedicated to the theme of autumn in the forest. Beauty, what more can I say.

Dancers girls from leaves, acorns and twigs. Original, original!

And here is just a bouquet of roses from the leaves. Just twist the leaves that have not yet dried and the buds will be ready.

Original crafts made from natural materials and plasticine on the theme of golden autumn
Now I propose to look at the options for products with the inclusion of plasticine. I will not describe in detail what and how, because from the photographs everything is clear and understandable. There will be questions, then write in the comments, I will answer.
- "Caterpillar";

- "We collect mushrooms";

- "Forest animals";

- "Walk in the forest";

- "Visiting Baba Yaga";

- "Puppy";

- "Funny snails";

- "Beasts";


- "Butterfly";

- Insects";

- "Life in the forest";

- "Mushrooms".

Step-by-step master classes for making autumn crafts "Hedgehog", "Cockerel" and "Owl"
Well, as promised above, I will tell and show in detail how you can make the most popular crafts from natural materials. Ready?! Then let's start!
Hedgehogs from burdock in the autumn meadow

You will need: leaves, twigs, cones, tree mushrooms, burdock, plasticine, sticks, any box, scissors, PVA glue, hawthorn berries, mountain ash or any others.
Work process:
1. To make a clearing, we need a piece of cardboard. Take any box and cut out the required size of cardboard.

2. Draw a forest edge on the cardboard. Glue the leaf, cones, berries and tree mushrooms. And in order for the branches to stand, fix them with plasticine.

3. From plasticine yellow color make a head for a hedgehog. And from black make eyes and a nose.

4. Insert a non-fragile stick into the plasticine head.

5. Now form a body with thorns from the burdock.

6. As a result, you should get such a hedgehog. Do not forget to stick a piece of plasticine on the end of the stick, otherwise the face will outweigh.

7. Put a couple of berries on top of the thorns.

8. Make another hedgehog and put them in an autumn clearing. Your craft is ready.

Cockerel from cones

You will need: pine cones (large and small), plasticine, scissors, autumn leaves, rowan berries.

Work process:
1. Take two small dense leaves, preferably with the greatest predominance of red. Cut them into narrow strips, as shown in the photo. Cherry leaves work very well for this.

2. Attach the resulting leaves to a large cone (trunk) with small pieces of plasticine.

3. Now make a long and bright tail. To do this, use the technology described in paragraph 1. Take yellow, green and red leaves. Rowan, ash and grape leaves are well suited. Fasten the blanks with a piece of red plasticine.

4. Attach the tail to the top of the pine cone.

5. Make a stand for the cockerel from green plasticine. Decorate the stand with rowan berries.

6. Attach the torso to the stand.

7. Now make the head. Take a small bump. And make a beak, comb, long earrings from red plasticine. Roll up round eyes from black plasticine. Fasten everything to the bump.

8. Blind the neck from orange plasticine. And take one leaf and also cut it into strips.

9. Attach the neck to the body, and then fasten the head to the neck. Stick a cut leaf to your neck.

10. Finally, place the cockerel on a hard surface and decorate its place with any autumn natural materials.
And for a snack, an owl-owl. The craft is made from dry leaves and a transparent bag. Everything is very, very simple. The result exceeds all expectations. So rather watch the video and do everything according to the model.
And since I can't stop, get some more cute ideas.
Chanterelle-sister from carrots. And her clearing is made of various natural materials.

Smeshariki also visited autumn. There is a fantasy - there is a result.

Another family of mushrooms. Twigs can be taken brown, and then just paint them with white paint.

And here is a hedgehog who found a ripe apple. There is a plot, which means the craft is ready.

Well, the invented forest dweller will decorate any work.

Well, now that’s all, I must stop, otherwise I won’t finish writing like that). Finally, I note that all the collected works are not mine, but taken from the Internet. So once again I will praise all the authors - “well done”, the crafts are all cool and for any age and taste. And I wish you, dear readers, to work hard and win prizes at exhibitions. Let your children receive their first diplomas and awards. All for now, for now.
Every autumn kindergartens announce contests for the best autumn crafts. Usually, nature itself suggests ideas for implementation: curved snags can be easily imagined as snakes and dragons, any men and animals can be made from acorns, chestnuts and cones, plots for applications suggest themselves from leaves. But if you have no time to fantasize, but you want to make an autumn craft for kindergarten with your child with your own hands, Active Mom tried for you and created a selection of interesting ideas.
Crafts from acorns and chestnuts
Perhaps the most popular natural autumn material is acorns and chestnuts, which are in abundance in every park at this time, I don’t want to take them. And we want to! And we return from a walk, carrying packages with these treasures in our hands.
Acorns and chestnuts make excellent topiary. To do this decorative tree, crumple the paper, forming a ball out of it, wrap it with thread and paste over with white napkins / paper towels. The "trunk" of the tree will be a strong, even branch, which must be wrapped with twine, ribbon or corrugated paper. Any container can be used as a pot, the main thing is that the tree stands firmly in it.


But, of course, most of all, children love to make little men, animals and birds out of acorns and chestnuts, because this a great opportunity seamlessly transform creativity into play.

These charming owls are obtained from chestnut, acorn caps, paws cut out of felt, wings, beak and glued puppet eyes.

Matches (toothpicks), plasticine, maple and ash fruits (for wings, ears, tails) are also required as additional material. Such autumn crafts for kindergarten it is easy and simple to perform even with a three-year-old child:

But not just a craft, but a real composition.

Overdoor wreaths of chestnuts and acorns look great. If the little animals seem too “childish” to you and with a preschooler from senior group I want to make not a toy, but an element of decor - this is your option. The basis of the wreath is an intertwined vine. For fastening acorns and chestnuts, Moment glue or liquid nails are used.

Candlesticks made using natural materials look stylish. Making them is very easy.

Crafts from cones
Cones are the second most popular natural material in autumn. From the cones, spectacular baskets and vases are obtained that can be filled with autumn gifts of nature: apples, grapes, mushrooms, twigs with mountain ash, wild rose, sea buckthorn. To make a vase, you will need wire, fishing line, pliers.


And look how charming flowers are obtained from cones if they are painted! Admit it, you did not immediately guess that these were cones?


Well, where would a kindergarten be without a variety of bumpy animals and birds.


Autumn crafts from vegetables and fruits
In creating compositions for kindergarten, you can actively use vegetables and fruits that autumn is rich in.

The most popular vegetable for making crafts is, of course, pumpkin. From it you can make a vase for flowers or autumn leaves, a basket for vegetables.

And you can use it as a blank for creating an animal or a bird ...

... or even such a madam.

From a pumpkin, you can build such a ship:

Apples, potatoes, zucchini will be an excellent material for crafts:


Applications from autumn leaves and natural materials
Early autumn is a beautiful time - the time when the trees change their outfit and prepare to part with it until spring. At this time of the year it is nice to take a walk in the park or in the garden, to rustle the fallen leaves. Autumn fascinates both children and adults, and it’s hard to resist collecting a bouquet of colorful leaves, or picking up fir cone, or maybe a bizarrely shaped driftwood. But all this - and leaves, and cones, and snags, and chestnuts, and acorns - is an excellent material for creating amazing crafts: beautiful applications or figurines fairytale heroes, elegant decorations and gifts to friends and relatives. Do not miss this time, collect more different leaves: large and small, yellow, red and green.
We would like to introduce you to applique works made from dry natural materials: tree leaves, grass, flowers, seeds (ash lionfish), poplar fluff (cotton wool, fluffs - dandelion seeds), straw, shells, pebbles, cereals, eggshell etc.
Classes with appliqué from natural material help to develop in children a love for nature, to cultivate a caring attitude towards it. Creating a picture, children compare natural objects with their images, learn to see the depth of nature. Application classes develop creative imagination in children, the ability to see in a pile of dry leaves unusual images. Children develop a sense of aesthetics, rhythm, color, the ability to work accurately and accurately. In their compositions, children express their inner world they create by creating their own works of art.
Collection of natural material
The more diverse the material you and your children collect, the more creative and interesting your work will turn out. You can collect plants at any opportunity: in the yard, on a walk through the forest, a trip to the country, etc.
Autumn is a wonderful time! On the street beauty, golden leaves, autumn flowers, pot-bellied, plump pumpkins and squash, fragrant apples ripened in the beds and gardens. There are a lot of mushrooms, chestnuts, spruce and pine cones in parks and forests. Harvested sunflower seeds, peas, beans. And all this charming and autumn-like fragrant beauty and generosity of nature can be used not only for its intended purpose, but also by making wonderful crafts from natural materials with your own hands.
Everything that autumn gives us can be used in creativity. Such crafts are always needed in kindergartens and schools. Teachers organize fairs and exhibitions where toddlers and older children can boast of what they and their parents or themselves have created from what nature has prepared for us.
Any ordinary cone, leaf, or even a pumpkin or acorn can be turned into an unusual creature endowed with character or a beautiful composition. One has only to put a little imagination and quite a bit of effort and time, as you can see the magical transformation and the birth of a small creation. Let's look at how it is possible to create from all that is in the beds and in the forest unique crafts from natural materials with their own hands to a school or kindergarten group. Consider the processes in stages or just ideas for wonderful creations.
The beginning of autumn in kindergarten is marked by the start of any exhibitions and craft competitions. To do this, kids and their mothers collect leaves and acorns, cones and chestnuts and come up with interesting and intricate combinations, turning it all into amazing items. Let's look at the ideas of crafts from natural materials with our own hands in the kindergarten, we will analyze one step by step.
Since autumn is the time for cobwebs and spiders, let's do this craft. Make it together with the baby, he will be delighted.
Let's prepare everything you need:
- thin and long branches of the same size - 4 pieces;
- white thin threads;
- a few autumn dried leaves;
- chestnut;
- some plasticine;
- legs from leaves - 8 pieces;
- hot glue (gun).
Let's start crafting:
- We fold the branches crosswise, wrap the middle tightly with threads or glue it with a gun with a hot ley.
- We wind a web of thin white thread on the branches according to the pattern, wrapping each branch tightly in turn.
- Now we make a spider. We glue eyes from plasticine on the muzzle, glue 4 legs from the roots of the leaves on the sides.
- We glue a sheet in the center, and a spider on it.
- Glue a few more leaves on the cobweb.
The autumn cobweb is ready.
hedgehogs in the meadow
Let's prepare the necessary material:
- cardboard base for crafts;
- cones;
- leaves;
- pine needles;
- plasticine;
- two potatoes.

And now we master:
- Glue the leaves onto the cardboard base.
- Glue cones around the perimeter.
- We make hedgehogs: we make a muzzle, sticking plasticine eyes and socks, we stick pine needles into the potatoes from above.
- We glue hedgehogs on plasticine in the middle of the composition.
- On the needles of each hedgehog, you can stick a fungus molded from plasticine or an apple.
And here is another option and cones. To make it you need:
- plastic bottle and 2 additional caps;
- cones;
- foliage;
- rowan berries;
- glue;
- paint (brown).
Making a hedgehog:
- Coloring the bottle Brown color and her cork in black. We glue toothpicks painted black to the cork. These are mustaches.
- We make eyes from two white caps from plastic bottles.
- We glue the cones on the glue as hedgehog needles.
- You can stick rowan berries, leaves or something else on the cones.
- We will make a stand for the hedgehog by sticking the leaves on the cardboard. We put the hedgehog on a stand and bring it to the garden.

These wonderful crafts from natural materials can be made quickly and beautifully with your child with your own hands. The kid will definitely like the process, and the guys in the group and educators will appreciate the result.
We make from cones and chestnuts
Handicrafts made from natural materials, made from cones and chestnuts, are very interesting and unusual. From cones, you can make any figures of a man, magical creatures, animals. The same goes for chestnuts. In one composition, you can use several types of natural material, arranging them as you need as planned.

From chestnuts and cones you can make:
- Chelovechkov.
- Ants.
- caterpillars.
- snails.
- Mice and bear cubs.
In general, any living creatures, for which there is only enough imagination.
All animals can be glued to the base (for this, take cardboard or a lid from the box). Then fill the base with moss and dried leaves.
Seeds and grains
Do-it-yourself wonderful crafts on the theme of autumn from natural materials are obtained from cereals, grains and seeds. You can lay out panels from them, fill in the missing fragments in three-dimensional structures with them. Let's take a look at a few of these creations step by step.
From this material the child himself can also make. This activity is very pleasant and useful for the development of imagination and fine motor skills fingers.

You need to take as a basis dense sheet or cardboard, draw on it the outline of the future composition. Then coat the individual fragments with glue and stick the seeds. Cereals or grains. So you need to fill in turn all the elements of the picture.
Another version of the panel using seeds and grains. We put a drawing on cardboard and fill it with plasticine. To do this, fill different fragments with small pieces of plasticine. different color as if rubbing it. And only then on the plasticine where necessary we glue the seeds, pressing them into the layer of plasticine. For these panels, you can use drawings of animals or insects, landscapes.
Without vegetables
A special place is occupied by crafts made from natural materials with their own hands, made from vegetables or using them. Usually, bouquets or any works of pumpkin look very bright and stylish, in autumn they look beautiful. This is a bright vegetable that allows you to unfold your imagination. He can turn into a mushroom, and into a forester, and into an owl, and into a flowerpot for a bouquet. Let's take a look at a few options step by step.

Pumpkin spider house
- We cut off the barrels from the round orange pumpkin and clean out all the seeds.
- We stick pins with round heads around the perimeter of the resulting window and pull a mesh of jute rope over them.
- We make a pouch. We glue 2 chestnuts, make eyes from plasticine for him and glue 8 paws from straws.
- We plant a spider on the glue near the cobweb.
- The pumpkin can be decorated with another small window with a cobweb or randomly stick autumn leaves on it.
Apple caterpillars
- One caterpillar needs several apples.
- We attach eyes and a nose to one apple, decorate it with a hat or a bow, put it on a toothpick and stick it tightly into another apple from above.
- We connect several apples with toothpicks.
- On the sides of the toothpick we stick the legs from the pieces of carrots, and at the back we put the tail on the toothpick - the tip of the carrot.

"Cornucopia of fruits and vegetables"
You can make a whole family of such caterpillars.
Potato hedgehogs
- We take a few potatoes and cut one half into a cone, this will be a muzzle.
- We make out the muzzle with eyes (they can be glued ready-made or made from plasticine or beads).
- We paint the nose with black paint.
- We stick toothpicks as needles. You can plant a small apple or leaf or fungus on the needles.
For such crafts, you can use zucchini, cabbage, carrots, apples. What can be done with all this rich harvest. The following are a few photos of do-it-yourself crafts made from natural materials for a kindergarten or school. You can try to make something similar or come up with variations.
We create masterpieces for the school competition
In many schools at the beginning of each school year hold competitions and exhibitions. Often the task for such events is to create a composition, a bouquet of what can be found in the fall. First-graders are especially responsible for these competitions.

We offer several ideas for crafts made from natural materials, which you can simply quickly and beautifully make with your own hands in grades 1 and 2. They are pretty simple. Some first-graders and second-graders will cope without the help of their mothers, but for more difficult masterpieces, the help of parents is needed.
landscapes
They like to bring landscapes or scenes with the participation of any characters from cones, acorns, chestnuts, twigs and roots to school, and even to kindergarten. It is very interesting to make them yourself and imagine how ordinary twigs and cones come to life and begin to live a new, magical life.
Autumn bouquets
Classics of the genre - autumn bouquets from foliage, dried flowers, branches in beautiful variations and in an interesting design.
As a container for a bouquet, you can use a beautiful bright pumpkin and fill it with dried flowers, twigs and leaves. The pumpkin will need to be prepared:

- cut off the crown;
- clean out the seeds;
- blot the inside of the pumpkin with a paper towel.
Now you can fill it with a beautiful composition to your taste.
You can make roses from maple leaves. How to do it:
- For one rose, you need several (6-7) maple leaves.
- The first sheet is folded in half and tightly twisted into a tube.
- Next, fold the second sheet in half and wrap it around the first twisted sheet, but press it tightly only at the base, and leave the top free.
- We wrap the third sheet folded in half around the second, covering the joints.
- So we twist all the prepared leaves into a rose. We fix the thread at the base.

We make several of these buds and collect them in beautiful bouquet. You can supplement it with other leaves or collect a whole basket of autumn roses.
Topiary
A very interesting kind of bouquet or tree that will be in a pot. Topiaries are made from the most different materials. Let's see how to make it from natural material in the fall. Let's prepare everything you need:
- pot or small low vase. You can use any tin can by wrapping it tightly with jute rope or wrapping it in burlap;
- rather plump twig (for the trunk);
- a foam ball or a newspaper crumpled into a ball, wrapped in threads;
- any natural material: moss, leaves, chestnuts, cones, acorns, dried flowers;
- gypsum;
- hot glue gun.

Let's get to work:
- We put the ball on the barrel, fix it with glue.
- Dilute gypsum with water to the consistency of very thick sour cream.
- We put plaster in the pot and insert the trunk. Gypsum dries quickly, so you don't have to wait long for it to dry.
- We fill the pot around the trunk with moss and any material that is.
- We glue the ball with hot glue with leaves, dried flowers, cones, acorns and other natural material.
Topiary is ready. Here you can give free rein to your imagination and make very interesting compositions. These are the amazing things you can send to the competition of crafts made from natural materials with your own hands from grade 1 or even from older children.

We decorate the home
You can quickly and beautifully decorate a house or cottage in the fall with your own hands by creating simple crafts from natural materials.
autumn lanterns
On a dank and damp autumn evening, you really want to wrap yourself in a blanket, sit on a cozy soft sofa and dream. A suitable atmosphere will help to create candles or lanterns, which, by the way, can be made with your own hands using maple leaves or any other trees. Let's see how we can do this. First, let's prepare everything you need:
- autumn beautiful leaves, previously dried according to all the rules (more on this later in the article);
- transparent glass jars;
- PVA glue and a brush (you need to take it wider);
- decorative candles. You can use conventional or electronic batteries.

We begin the process of creating candlesticks:
- Gently coat the leaves with glue on one side.
- In a chaotic manner, stick them on the outer surface of the can. After all the leaves are glued to the jar, you need to smear them on top again with a thin layer of glue. Let dry well.
- The neck of the jar can be decorated with a tourniquet or decorative rope.
- Now we put a candle inside, light it and enjoy the comfort.
Autumn panel on the wall
We offer to disassemble 2 options for panels with which you can decorate a room in the fall. The first option is a picture of autumn leaves with a metallic sheen effect.
For the picture you need:
- the foundation. It can be a small canvas or a base from a photo frame;
- a few autumn leaves (prepared and well dried;
- PVA glue;
- putty;
- black acrylic paint;
- gold or silver acrylic paint;
- wide brush and sponge.

Let's get to work:
- We apply a thin layer of putty on the base. Further, all work must be done quickly, until the putty has dried.
- On top of the putty, lay the leaves smeared with PVA glue as you wish. It is necessary to press them quite a bit into the putty layer.
- With a crumpled piece of paper or another piece of paper, we blot a layer of putty in some places, where the leaves are not placed, to give it structure.
- Now let it dry well. Since the layer of putty is small, the work will dry quickly.
- Now cover the work with black paint. Let's dry.
- Now we dip a dry sponge into gold or silver paint, remove the excess and lightly coat the whole work to highlight the relief and give the effect of a metallic sheen.

This panel will look like it is an imprint of leaves on a metal surface. The finished panel will adequately decorate your interior.
The second version of the panel is a picture of dried flowers and twigs
For her, we will prepare:
- several branches different lengths and forms;
- rope or thick thread for knitting;
- dried flowers, dried leaves;
- scissors.
Let's start painting:
- You need to choose what shape the panel will be. It can be square or triangular.
- We fold the branches into the desired shape. Tightly wrap the joints with thread, cut the ends of the thread and hide.
- Carefully wind the rope or thread over the entire width of the resulting frame, making a grid.
- We lay blades of grass, leaves and dried flowers in the resulting thread mesh.
- After everything is ready, the panel can be sprinkled with varnish.

Miracle in a jar
Crafts made from natural materials may well fit in a jar and you can do it yourself quickly and beautifully in order to decorate a house or cottage and bring a touch of autumn mood to the interior.
Here's how it's done. Let's prepare everything you need:
- transparent glass jar with a lid. The jar can be of any shape;
- beautiful branch. Its height should be equal to the height of the can;
- small dried leaves or artificial leaves made of paper, plastic or felt;
- glue ( better fit thermal gun).
Begin:
- We glue the leaves on the branch in any order and in any place.
- At the bottom of the jar, we fix the top of the branch with hot glue.
- Apply hot glue to the tip of the branch and carefully close the jar with a lid.
- Turn the jar upside down and put it on the lid.

house of acorns
With such an installation, you can decorate any room in the fall or give an autumn souvenir to your loved ones. All these crafts can, if desired, be sent to an exhibition or competition of autumn works in a school or garden.
This article contains the most interesting, easy-to-perform crafts made from natural materials that you can create with your own hands and tips on how to implement them. Based on the above photos, descriptions and master classes, you can create one of the described crafts or, with a little imagination and combining some tips and tricks, make something of your own, unique and inimitable like autumn itself.