Do-it-yourself developing playgrounds. How to prepare a playground with your own hands for operation. Playground - universal option
Both boys and girls love to play drivers! Just put something in your hands, at least somewhat similar to a steering wheel, and the engine has already started and - let's go !!! Stools become cars, sofas become regular buses ... Let's turn on our imagination and build almost real cars for little drivers so that there is something to steer on!
And it doesn't matter that in fact these cars will stand still - be sure that with a rich imagination, the kids will visit the Crimea, and Kyiv, and Samara!

Let me show you the photos I collected during the raid on the outskirts of my native microdistrict! This is generally a beauty - the imagination of the people is simply inexhaustible, and this is wonderful. Let's see what and how to make a children's car with your own hands!
In one yard there is such a truck with sand - 2 in one! Both the car and the sandbox! If you want - rudders, if you want - play in the sand. Or like this: the older brother turns the steering wheel, and the younger sister sculpts the beads.
And no one fights, bored out of boredom, picks up trash and hits a friend with a dustpan! Everything is in business.

And to make this for children good thing, all you need is:
- boards for the hull, sides and benches;
- paints to paint the car;
- certainly - an old steering wheel, and maybe there is an instrument panel;
- a couple of dads with tools that will put it all together!
On the evening of work, and children from all over the yard, and yours too, and their friends will play for a long time! Unless, of course, there are harmful hooligans who have already broken one similar machine in the neighboring yard. In general, so as not to want to break - catch them ... and involve them in the construction! Let not the first time, they will understand that it is much more interesting than breaking. And join! They will also protect from other irresponsible people, such as themselves recently. Indeed, in fact, hooligans are also just children who have nothing to do. Here they are out of boredom and begin to misbehave. And it is worth finding a worthwhile business - and everything is getting better right away! Watch the video - how two boys decorate their yard!
But such a cute MAZ is in kindergarten!

The main thing is the steering wheel! And the pedals are in place, as expected - gas, brake, clutch. You can go!

In the cab at MAZik there is a comfortable soft seat upholstered in leather, and in the back there is a roomy body with benches, you can even put the whole kindergarten group, all your friends, and go together to distant lands!

In the meantime, dads will be making a car, while waiting for the kids to have fun watching a fun assortment of cartoons, and along the way learn a song of travelers!
Dacha is a great place for a family vacation, where you can escape from the bustle of the city and annoying smog, enjoy nature and chat with friends. But there are still special family members whose comfort should be taken care of separately - these are children. And here, a properly equipped playground will not only make your children's vacation safe, interesting and useful, but will also allow you to devote more time to the garden, flowers or just relaxing.
How to make a playground in the country: safety rules
The main and basic rule for a playground in the country is safety. That is why a place for her is chosen away from dangerous places - a barbed fence, deep pond, decorative electric lamps, greenhouses, etc. It is necessary to correctly orient the site according to the sun - it should be present for several hours, best of all - in the morning, so that at noon the site (well, or at least part of it) is covered with a shadow, because prolonged exposure of children to the sun is categorically contraindicated. And the unshaded part of the site is optimal for installing a children's pool with a slide there - so the water in it will warm up faster. An approximate diagram of the playground is shown in fig. one
Safety is the main feature of goods for children
Covering for playgrounds must be completely safe and perform protective functions in the event of a fall, prevent injury. Also, the surface must be dry and non-slip, under any circumstances remain clean. In addition, it is great if the artificial surface has beautiful view and interesting for kids. As practice shows, a child plays much more actively on bright surfaces, showing his own imagination and ingenuity. Company CRUMB makes playgrounds, observing all safety standards and requirements.
When choosing a place for arranging a playground, you should remember that children must be supervised - it is not necessary that parents are directly on the playground, especially if the children are old enough. It will be quite enough for the children to be in front of your eyes, to watch them from home, from such a distance from which you can have time to react to the "undesirable" games of children. And a few more rules to follow:
- the territory of the future playground must be carefully leveled, removing bumps, large stones and roots sticking out of the ground, weeds and other debris - all this should protect children from falling, because often, having played, they do not look much under their feet
- absolutely all mortgages (supports for swing, houses, slides and other buildings) the details of the site should be deepened by at least 50 cm and, preferably, concreted (well fixed)
- swings, front and back, must have "safety zones" - at least 2m of free space
- all wooden parts on the site must be carefully sanded, and preferably covered with non-toxic paint (varnish)
- all fastening elements of suspended and hinged structures must be made of durable metal and securely fasten parts of the structure
- the condition and wear of the carabiner, with which the swing can be attached to the hook, is checked at least once every six months
The coating for playgrounds in the country will require special attention - it should be soft to soften the fall, and quick-drying - when playing, children spend a lot of time on the ground, and excessive humidity can provoke a cold.
Existing special rubber flooring for play areas fully satisfy these requirements, but they are very expensive, plus this type of coating is more suitable for a sports ground, but in the country you want something more natural, natural. Therefore, a lawn made of resistant varieties of grass is optimally suited as a coating - such are used, for example, for football fields, on the playground the load will be no less. But it is better to use a combined coating, for example, near the slides and gymnastic apparatus it is worth making a sandy coating - if it falls, it will soften the blow.
Do-it-yourself playground in the country: drawings and ideas
In order to fully decide where and how to equip a playground in the country, it is important to determine its size. According to the standard, a child under 7 years old should have about 8-9m 2 on the playground, and for older children (7-12 years old), when needs and play priorities change, it will take from 13 to 15m 2. So planning plot"for growth", it is worth providing "reserve" meters for the time when the child grows up. Well, unused square meters can be temporarily used, for example, under the lawn.
For a rented dacha or for a while, while the site is just getting used to, you can completely manage to create a children's play space finished goods– camping tent house, inflatable paddling pool with beach umbrella, small table and bench for drawing. But they can be perceived as a temporary solution, because Chinese products (and they are overwhelmingly on the market) are far from always able to withstand the temperament and energy of our children.
The playground is planned based on the age of the child, but at the same time, several mandatory attributes of the playground can be distinguished: sandbox, slide, swing and garden house.
Sandbox
The sandbox is a place where fantasies come true, building impregnable castles and baking sandy cakes. And this is the easiest element of the playground to build. To create it, you can use materials that are left over from the construction of the house, as well as stumps, cut logs. If you dig logs and stumps of different heights, then the sandbox will become not only an original decorative element of landscape design, but also a kind of sports equipment - children like to walk and jump along these “ladders”.
The diagram of the simplest sandbox is shown in fig. 2
Before starting the installation, the soil is removed to a depth of 25-30 cm, the bottom is covered with drainage material (pebbles or crushed stone). The minimum recommended size of the sandbox (for children 2-5 years old) is 170x170 cm.
Advice! So that the sandbox does not attract the attention of animals, especially cats that can arrange a toilet in it, it is better to make a closed version of the sandbox - such a sandbox can be “covered” for the night (Fig. 3)
Slide
A fairly complex product (Fig. 4) for self-production, you will have to take into account quite a lot of nuances.
First of all - the height of the slide: for children 2-5 years old it should not exceed 1.5 meters, for younger students - within 2.5-3.5 m. The ladder should have wide steps located close enough to each other. It is optimal if they have a special anti-slip coating - this is especially true if there is a pool nearby or the slide ends in the pool, and children can climb the slide with wet feet. In addition, the stairs should be equipped with strong handrails that do not end above the top step - having reached it, the child must hold on to something with his hands. For greater safety, the upper platform should be spacious enough and fenced with railings on the sides.
But most of all there will be problems with the slope - for this you can use multilayer plywood coated with varnish. But still, the best option is to buy a ready-made plastic ramp, it is much stronger and, which is especially important for a slide, has a much better coefficient of friction. Plus - you can choose a regular, straight (Fig. 5) or screw (Fig. 6) slope.
Swing
To install the swing, you need to choose a spacious place, taking into account the swing amplitude. The easiest option is a rope swing if there is a strong enough branch on the tree. Can buy ready-made version, but if you want to make a playground in the country with your own hands, then you will need:
- two wooden racks - a diameter of at least 12 cm and a length of about 3 m
- crossbar - about 12 cm in diameter and about 1.5 m long
If there are small children in the family, they definitely need to build and subsequently equip an outdoor playground. Such play areas are an indispensable object on the territory of a private house or cottage.
While the kids are playing fresh air, adults can relax or do housework. As soon as the parents are free, they can always join the children.
An open play area can be made much more interesting, more fun and colorful if you make crafts for the playground. It is not necessary to buy ready-made garden decorations, because there are a lot of exciting ideas that can be easily implemented.

Tire dinosaur
Bottle palms and a plastic zoo
Perfect for making crafts and decorations for the playground.
If you collect bottles of different shapes and sizes, you can make very interesting compositions: palm trees, animal figurines, flowers and other objects. Try making an exotic palm tree corner or a fun menagerie.

It is very easy to make, for example, a piglet: a five-liter bottle is suitable for the body, and two-liter bottles are for the limbs. The ears and tail are also cut out of plastic.
The bottle flower garden looks original: cut the necks in the form of bells and other flowers, and the leaves will be bases without a bottom, cut into several parts.
Decorate the bottles with paints and fix in the right places. Such decorations are very practical: they will not deteriorate either from rain or from the sun.
The palm tree is made as follows: the bottom is cut out from the bottles, after which the blanks are strung on top of each other. A metal rod is placed inside the bottles - the base of the tree. The crown consists of one or more bottles, cut from the bases to the necks into strips-leaves.

The strips need to be cut obliquely so that they look like real palm leaves. The crown bottle is inserted with the neck into the barrel. To do without paint, you can use brown and green bottles.
Plywood is an ideal material for making flat figurines. On it you can draw everything that your imagination tells you: heroes from films, characters from cartoons, etc. The figures are cut out, painted and placed on the site.
You can create a whole composition from individual elements or paint a bright picture on a large white piece of plywood. Such a picture can be used as a demarcation fence for areas in the garden.

Mounting foam is not used as often as plastic or plywood for playground decoration, but, nevertheless, very interesting compositions can be made from it.
Foam figures look like toys, they look great and kids love them. From foam, you can make any shape, which is then decorated.

Animal figurines from boulders
Large boulders and pebbles are a suitable find for decorating a playground. Round stones decorate bright colors, resulting in funny bugs, hedgehogs and other animals.
For stones it is better to take acrylic paints, which are then covered clear varnish. Pictures with clear contours look interesting.
The outline is first drawn in pencil, then in black or white. The space between the lines is filled with colored paints. From several boulders, you can make a whole family of hedgehogs or ladybugs.

Combining materials - a flight of fancy
Logs of various shapes and sizes are great for decorating children's play corners. Many materials go well with each other: logs or tires and bottles.

From bottles you can make a beautiful fence for a lawn or flower bed in the form of animals, plants and insects. Try to attract creative process child: children always have several original ideas and solutions.
If there was an old sawn tree in the garden, do not rush to uproot the stump. A funny figure or a whole house with a door, a roof and windows will come out of it. It is not only fun for children, but also a wonderful decorative element for garden.
A bright, positive composition can be made from bottles and a small tire. Nail bottle caps around the tire, then screw bottles into them - you get a cheerful sun.
Do not rush to get rid of unused building materials after repair. So, for example, ornate paths or the space around the figures can be laid out with pieces of ceramic tiles. Broken tiles are useful for laying out mosaics and depicting fairy-tale characters.

Draw the outline of the shape on the path, then lay it out with tile pieces. In order for the composition to be durable, it must be laid out on a cement composition. Do not forget to wipe the seams after drying.
On video interesting ideas to decorate the playground with your own hands:
This is an essential element of any children's play area. Babies like to have their own corner to hide in. are log and frame. The interior design depends on the imagination of the parents and the child.

Pergolas from climbing plants
If it is not possible to build a wooden house, you can take note of an alternative option: a frame is made of wire, and any climbing plants (bindweeds, grapes, etc.) start around it. Such an arbor pleases the eye of both adults and kids.

Stump decoration
All ideas for the design of stumps can not be counted. Here are the most popular of them: the old forest man and the fly agaric mushroom.

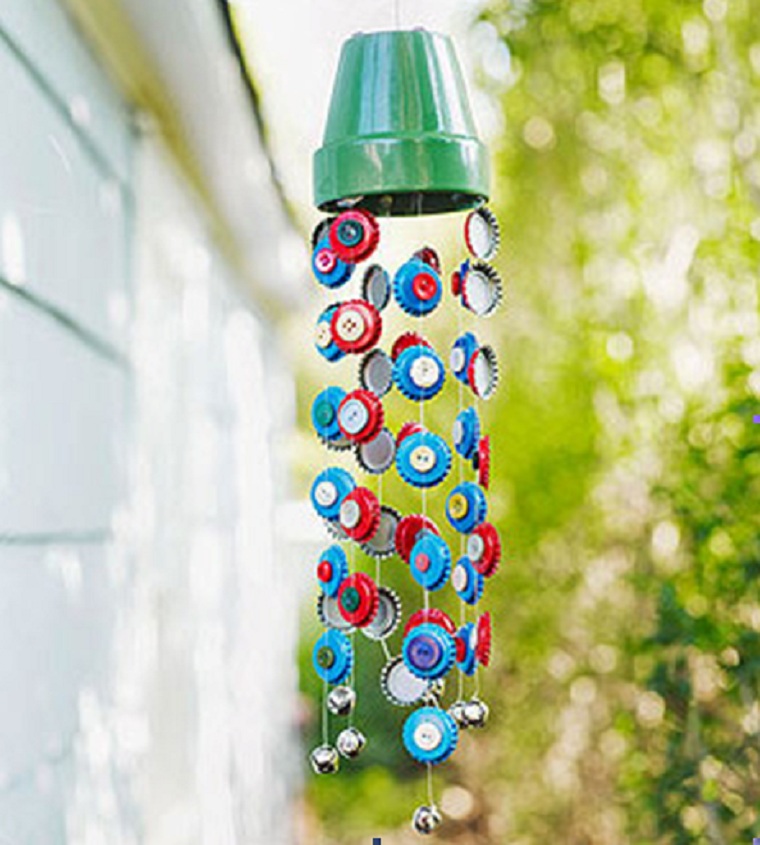
When the bells ring back under a gust of wind, an unusual, fabulous feeling immediately arises. You can make them from iron bottle caps and unnecessary keys.
Make a cozy nest of branches with your baby and place a decorative bird or butterfly in it. Fix the composition on the tree.
A butterfly made together with a child contributes to the development of motor skills and creativity. You can make it from beads, clothespins and thick threads.

If you attach a pin to the back of the butterfly, it can be used as a decoration for clothes or curtains.
How else can you decorate a playground or a country yard - a photo selection:
Boxes and baby shoes
From cardboard box a wonderful pirate ship will come out. You can also make decorative fences and dividers from boxes and unnecessary shoes.
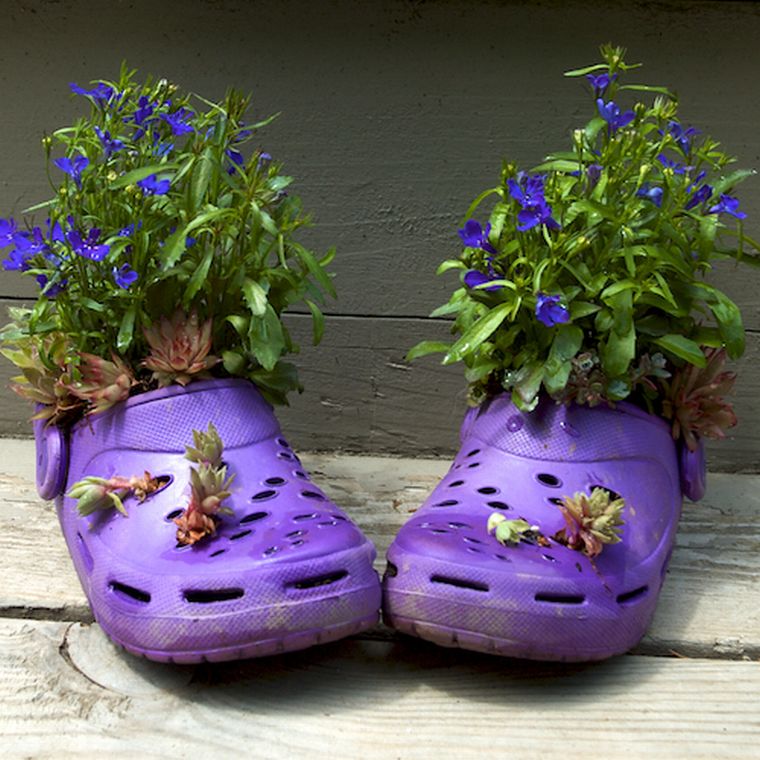
Materials for decorating a children's play area can be very different: from trees and stumps, to old shoes and empty bottles. The main thing is to show imagination and desire.
Any country house will have an additional advantage if, in the courtyard next to it, you can equip a playground with your own hands. For every person, the time spent on the playground is one of the most important stages of his life. After all, we all remember how in childhood we built sand castles, jumped rope, ran a race, played hide and seek and other outdoor games. Life in the yard, as they say, was in full swing.
Times, of course, have changed, but despite this, it is important to continue to understand that every child must go through this. A playground in the country is a kind of school where children get their first communication skills with peers, learn relationships and mutual understanding, learn the rules of behavior in society, develop their imagination, dexterity and endurance.
Playground safety
The local area should be associated primarily with a safe playground where you can play games. different games. After all, the fantasy of the kids is such that they can frolic in any place for hours. In this case, the safety of the structure must be carefully monitored. This applies primarily to sports structures on which small children play.
Important! To create the safest playground with your own hands, it is necessary to analyze the main reasons why injuries occur in such areas. Not all injuries are inevitable, leading experts confirm.

Safe flooring for playgrounds
Falls is the leading cause of injury to children on playgrounds. Many believe that falls cannot be avoided, because every person in childhood often fell and received bruises. But after all, a child can fall not only, for example, by tripping over a stone, but also from some high structure, which is much more dangerous.
The severity of injuries is determined mainly by how hard the surface of the playground was.

The hardest and, accordingly, the most traumatic material is concrete. Playgrounds for children, equipped on the basis of this material, oddly enough, are found in many courtyards of private houses. Asphalt is second in terms of injury risk, followed by densely packed soil.
Interesting to know! More recently, sand was considered the safest surface for playgrounds. But with the development of technology, even safer materials began to appear on the market, for example, crumb rubber.
A layer of crumb rubber only two or three centimeters thick is able to effectively soften the blows without any consequences for the child's insufficiently strong body. The most dangerous areas can be covered with a thicker layer of crumb rubber (up to 10 cm).


Wood chips - natural natural material perfect for cushioning

Bruises and injuries from falls
Children of the swing, as a rule, are not afraid, trying to fly as high as possible each time. But when a person grows up and has his own children, he has a certain fear about these structures.
And for good reason, as swings and falls are common causes of injury in children. In some cases, it leads to serious consequences, so it is very important to make them as safe as possible.

Important! The greatest threat is posed by swings of the beam and rod type with seats made of wood or metal. For safety reasons, it is better to completely refuse to use a swing of such a structure.
Seats in the form of rubber or leather belts suspended by means of polypropylene ropes or metal chains. It is very light and practically devoid of sharp corners of the design.
And even if it happens that a child accidentally hits such a seat, it will be limited only by his fall, and on a soft and safe surface. Thus, you can avoid injury to the baby.


Important! To protect the playground as much as possible, a fence can be installed around the swing. The distance at which it is placed should not only prevent the baby from being injured if he suddenly fell, but also from being too close to the swings of children playing on the playground.
Smooth surfaces and no sharp corners
No less traumatic on the playground are rough surfaces, sharp corners and various moving elements. That is why, without exception, all wooden and especially metal parts of structures must have rounded edges.
At the same time, the parts themselves must have a well-polished surface and high-quality painting, and using only environmentally friendly compounds.
Important! If you are going to build a playground in the country with your own hands, you need to remember that protective covers must be “put on” on all moving mechanisms, which completely exclude any possibility of clamping, for example, a child’s clothes.


Do-it-yourself playgrounds in the country
A multifunctional summer cottage allows you to equip comfortable areas designed both for adults to relax and for organizing useful activities for children.
At the planning stage, it is important to consider the basic equipment of the playground, taking into account the age characteristics and individual preferences of the younger family members.

Planning a playground is an important stage of construction, which should contain a set of measures for the improvement of the adjacent area


Projects and drawings
To make the final decision where to equip the playground and how to equip it, you should calculate the optimal area of \u200b\u200bthe future building. A drawing is being developed, thanks to which it will be easy to mark the site.
This parameter per child depends on age:
- under 7 years old - 8-9 m2;
- 7-12 years old - 13-15 m2.
Important! Given this dependence, additional space should be provided if the site will initially be created for the younger age category. For example, there you can temporarily break the lawn.


Ideas for the playground (photo)
Fairy town for kids located close to the house in order to constantly monitor their activities. To the children of the younger adolescence should provide athletic facilities for which a site is selected near the blank wall of the house. This will prevent the ball from hitting the windows.
Advice! good option when constructing a playground, it is important to preserve the existing trees that provide shade. In open areas, consider installing hinges.

- When choosing a decorative solution for a playground, you do not need to strive to comply uniform style with the surrounding landscape and the house.
- Choosing color scheme, consider the wishes of children, they are known to prefer bright colors and fabulous accents.
- On rented plots, you can install ready-made houses in the form of a tent, around which you can place plastic tables, chairs, inflatable pool, collapsible trampoline.
- Stationary structures - slide, sandbox, cozy house, swing should be planned in an area that is used continuously.


The playground, subject to careful calculations at the design stage, allows you to rationally and conveniently place attractive for children different ages structures.
This approach provides not only the possibility of organizing a diverse gaming activity but also the development of their sports skills.


Slide
The construction of the slide begins with the development of a scheme in compliance with the exact scale. This will allow you to select the necessary building material.

Important! The main criterion in determining the height of a structure is the safety of children of different ages: 1-5 years old ≤ 1 m, over 5 years old - 1-2.5 m.
- The angle of inclination of the stairs leading to the hill should be approximately 25-30 degrees.
- The width of the steps varies from 20 to 25 cm. It is advisable to make their surface less slippery due to the rubber coating.
- Balusters and reliable railings are fixed on the sides.
- The handrails should continue above the top step so that the child, having climbed the hill, has the necessary support.

Children's slide - a diagram showing the exact dimensions

Ready-made are considered the safest plastic ramps- screw, straight, wavy, which are selected in accordance with the calculated dimensions.
If you decide to install plywood or wooden slopes yourself, you need to pay special attention to grinding their surface, which is then varnished.

Plastic descent - perfect solution for a modern children's slide in the country


Swing
Swing- probably the most vivid and memorable event from a distant childhood, which gave us an incomparable feeling of freedom, a feeling of flight and weightlessness. That is why garden swings have become an invariable attribute of recreation in the country for the whole family.
Sufficient space is allocated for the swing, given the maximum range of motion. It is advisable to provide for restricting the free access of children to this structure from behind in order to exclude injuries.

Many are wondering how to make a swing in the country with their own hands. The answer is very simple. It is only important to have the right material and tools. Classic variant swing is done as follows:
- If the site is open, beams are dug into the ground - wooden or metal with a crossbar at the top. For reliability, their foundations are concreted.
- Reliable ropes are tied to the crossbars or chains are fixed, on which a comfortable seat is attached below. In his role can be cutting boards, old chairs, car tires.

Swing device on wooden supports: 1.2 - upper crossbar, vertical supports concreted into the ground, 4 - fastener of the eye-bolt system, 5 - edged board 600x150 mm.
To make the swing more stable, and their base does not have to be concreted, you can use the support structure resembling the Russian letter "A".
For their manufacture, the same tools will be required. The only difference between such a swing is the presence of two supports fastened together by a transverse puff.


Beautiful swing in the country - the pride of their owners
Strong tree branches, canopy beams and other strong horizontal structures can act as supports for a children's swing in the country.
For example, to make an original swing from an old tire, you can hang it with a rope on 3-4 anchor bolts fixed in the side wall of the tire.


Tire swing - excellent a budget option without loss of comfort

A good option is a swing in the form of a wicker or linen hammock. For kids, a design that has the configuration of a boat, an airplane, a car will be attractive. They are equipped with backrests and seat belts.
Children over six years old will be happy to master a simple rocking chair-balancer, which can be easily made with your own hands.


Sandbox
Even the most uncomplicated sandbox, built in a summer cottage, becomes a favorite place for children to play. This element is an obligatory component of the playground, therefore, when designing, it is assigned a safe place.
Sandbox games develop fine motor skills hands and help children to be liberated, so it is very important that such a structure appears on your site as early as possible.

The material for the sandbox can be logs, chocks, saw cuts, cuttings of tess and timber. You can even use uprooted and trimmed stumps.
Advice! If available on site children's town objects that give a diffused shadow, they try to place the sandbox so that on a hot afternoon they provide children with protection from the sun's rays.

Important! The sandbox should not be placed in low-lying moist places so that the sand does not become very damp. In open areas, a canopy serves as a salvation from heat and ultraviolet exposure.
The most common sandbox design is the open box, which has a square, rectangular, or diamond shape.
With good woodworking skills, home craftsmen create from wooden parts ships, boats, cars, flowers, animal figurines.


DIY wooden sandbox
Building a sandbox in the country with your own hands is a simple matter and consists of several stages:
- Marking the site and removing the fertile soil layer;
- Organization of a drainage system for water drainage;
- Assembly of a wooden frame;
- Knocking down the shield protecting the sand.
Materials that will be required for construction

If desired, it is possible to obtain a combined design, if you dig logs at different heights around the perimeter of the sandbox, getting a sports track.
Most fast way is the installation of a finished plastic sandbox. This accessory is portable. It is recommended to cover the sand from animals at night with covers or specially made covers.


obstacle course
Children benefit from the combination of play and sports activities. To meet the need for movement, an obstacle course is being equipped on the playground.
Create it most often from available waste materials. A common attribute is car tires. They are dug on edge, creating a variety of configurations. It is convenient to run on such safe steps, jumping over without danger of injury.

There are many options for equipping an obstacle course. Children are happy to master the ascents and descents of the ladders, move, maintaining balance, along the balance beam.
An interesting obstacle course can be made up of benches of different heights, securely fixed in the ground. You can install gymnastic hoops in a row and pass through them at speed.


Often, with the help of twine or a garden hose, various figures are laid out for kids on the ground, along which they can move, performing simple tasks.

DIY tree house
Surely every child dreamed of having their own house on the branches of a tall tree - their own personal space with their own laws and traditions. We will talk about the construction of such a house.
For children, a small house located on the playground quickly becomes the most attractive place to play. Here they retire, arrange hiding places, communicate with friends.
The most mysterious exotic option is the placement of the house on a reliable scaffolding, mounted on a tree. Children, hiding among the branches, feel like heroes of adventure films. They enjoy climbing stairs, training their own dexterity.

Sequence and stages of construction work
Let's start with what should be the tree on which we will place our treehouse. First of all, strong and stable. The trunk should be thick, and the root system should be quite developed. And the branches themselves should not be fragile. They must be able to withstand the children's house, given the various weather conditions, wind and snow.
Advice! Hardwoods (birch, alder, linden, maple) are perfect for supporting the structure. However, in order to protect the children and the house itself, it is better to immediately cut off the fragile old branches.

It is necessary that the house be located at a height of no more than two meters, despite the fact that in American films such structures are located much higher. This impression is deceptive, and the very fact of such an arrangement is by no means plausible.
Important! A structure located at a high altitude will be unstable and endanger children.

After a suitable tree is selected, we prepare the tool and building material. In this case, for the construction you will need:
- Lumber (bars, boards, plywood);
- Chainsaw;
- Long tape measure;
- Level;
- Hammer and nails.
Advice! You can build the roof and walls of the house using artificial materials e.g. plastic. This will make the overall structure easier.

In order for the structure to have good stability, the structure must be attached not only to the tree, but also to the ground. First, we erect the floor and install reinforcing supports under it. Additionally, vertical poles (racks) can support the structure.
Building a children's treehouse with your own hands is no different from building any other object. Therefore, the sequence of actions does not change - first of all, large elements are installed and fastened, after which smaller ones are connected.

After the floor is ready, we proceed to the construction of the walls, and then to the roof. Parts can be assembled on the ground and only then attached to the overall structure.
The stairs leading to the house can be wooden or rope. You can also install a slide and a pole for descending and other game elements that children will be incredibly happy about.

- tree building it will look good if a reliable climb up a wooden ladder is duplicated with a net woven from a strong cord, and a thick twine is placed next to it, along which the kids will climb to the platform next to the house.
All these sports equipment is quickly mastered by children, training strength and endurance, and at their age they simply need it.

So, we built our fabulous Peter Pan house. You can leave it like that, or you can continue to improve it if you wish, for example, insulate, glaze windows.
Such a picturesque building in your garden or cottage will not only please the little family members and their friends, become their favorite vacation spot, but also decorate the landscape, impress your neighbors and guests.
Advice! The design and decoration of the house is best left to the children. After all, this place rightfully belongs to them. With their help, the tree house will acquire a bright, unique individual look.


A treehouse is the best way to brighten up your child's leisure time


A playground in the country from improvised materials is one of the most important components of landscaping the territory next to the house. It not only occupies children with useful work, but also contributes to the formation of their personality.


At the same time, you should always remember that such structures should be provided with the necessary security, and only harmless materials should be used for play structures.
We will send the material to you by e-mail
D For the normal development of children, they need to actively spend their free time - run, play, have fun. When creating playgrounds, the main attention is paid to their safety and functionality. To build do-it-yourself playgrounds on a suburban area or cottage, the photos of which you will find in this article, you will need some tools, carpentry, construction and locksmith skills.
Homemade playground
The design of playgrounds with their own hands, the photos of which are posted on the Internet, implies the presence of certain equipment. If you do not have something, do not be discouraged, here are a few ideas that will help you equip a playground.


Making a slide-house
A do-it-yourself playground in the country, a photo of which you can find on the Internet, always includes a slide or a slide-house. The base of the slide is a frame of 4 vertical posts. You can use only 2 racks, but then the possibility of creativity is reduced and the slide will be limited to one slope and one lift. On a frame of 4 racks, you can make a slide with one slope and several lifts. Make one lift in the form of a ladder, the other with normal steps, and the third with a rope.

This design seriously diversifies children's leisure. For a slide with a straight slope, it is undesirable to make the angle of the slope more than 30 degrees relative to the ground in order to avoid excessive acceleration and injuries.

Useful advice! If possible, use a plastic ramp sold in stores. With it, children will have more fun than with a straight wooden ramp.

What to make a slide-house
For this you will need:
Foundation preparation
Find a place for the slide and prepare a hole for the frame foundation. We recommend making a square frame with a distance of 1 meter between the posts. The size of the side of the pit should be 1.5 meters, the depth should not be less than 20 cm. Seal the bottom of the pit and pour a layer of crushed stone (fraction 15–25 mm) 10 cm thick there. compact it. You can also get by with small holes for each bar. In this case, the depth of the pit should be at least 50 cm. Saturate the lower edge of the beam with diesel fuel and molten bitumen, the treated part should rise 1.5–2 cm above the ground. Pour a crushed stone pillow on the bottom of the pit - a fraction of 15–25 mm, a thickness of 5 -10 mm. Insert the posts into the pit, level and ensure they are properly oriented - their edges should be parallel to each other (this is not required with logs or round bars). Then pour concrete.

Useful advice! The less water in the concrete, the stronger it will be. To make thick concrete more mobile, add plasticizers to it, which can be bought at a hardware store.
Bottom harness and slope
Tie the bars with a 50 mm thick board at the floor level of the house, and also install one longitudinal jumper. Fasten the boards to the bars with self-tapping screws at least 100 mm long. From a board with a thickness of 25 mm, make a tray for a ramp. To do this, cut 2 boards, the length of which is slightly greater than the length of the slope. Mark the angles of contact with the frame strapping and the ground, then cut the board with a circular saw or jigsaw. Attach the boards to the harness to make sure you did everything right. Then cut jumpers from the same board. The length of the jumpers is equal to the width of the slope. Lay the long boards on the ground and, using self-tapping screws, attach jumpers to them from the bottom side.


The distance between the jumpers is not more than 30 cm, and install the first and last jumpers 5 cm from the edge. Make such a cutout in the upper edge of the board so that the slope rests on the harness as if on a shelf, and the jumpers are flush with the harness. Attach the ramp to the harness using the corners of the bolts with nuts and self-tapping screws. Set the corners so that children do not get scratched. Fasten the corners to the slope with bolts and nuts so that there is nothing protruding or sharp from the side of the slope. Sew up the slope with plywood using self-tapping screws. They must be recessed by 0.5–1 mm, then puttied and sanded. Secure the bottom edge of the ramp with pins driven into the ground or anchor bolts.

Stairs
Cut two pieces of board 50 mm thick, the length of which will be slightly greater than the length. Mark and cut the corners of contact with the strapping and the ground. Cut 24.5 mm wide grooves in these boards for the installation of steps, then cut the steps to the required width and assemble the ladder. Fasten the steps to the side boards with self-tapping screws. Attach the ladder to the harness and the ground on the side opposite the ramp. Attach supports and railings to both sides of the stairs. They can be made from a board with a thickness of 25 mm. Supports and railings must be processed using a manual or electric planer to eliminate sharp edges, and then carefully sanded. The upper edge of the railing must be attached to the uprights.

Additional entrances, top trim and roof
On one of the sides, make a ladder from the same bar that went to the racks. Process the cut bars with an electric planer to slightly round the edges. Attach these bars to the posts at a distance of 20-30 cm from each other. Screw the first bar at a distance of 20-30 cm from the ground. Prepare an extreme ascent to the house. To do this, make the same tray as for the ramp, but set at an angle of no more than 20 degrees with respect to the uprights. Tie the posts at the level of the ceiling of the house with a board 50 mm thick. From the side of the extreme entrance, reinforce the strapping with steel corners. Cut and lay the plywood on the floor, then hem the plywood on the ceiling. Sheathe the house with plywood on the outside, making round or oval entrances. Determine the size of the entrances / exits yourself so that the child is comfortable. To make the roof, cut 4 rafters from a 25mm board. The angles of the rafters are determined based on the height of the roof. Attach the rafters to the corners of the frame and connect them together from above using metal corners. Cut the plywood into pieces of the required size and sew up the roof.

Cutting plywood with a jigsaw
Final works
When finished, be sure to sand all the places where the child can drive a splinter. Then handle ramp, steps and extreme climb parquet varnish. Attach a rope 10-15 mm thick to the top harness on the side of the extreme climb and tie knots on it every 20 cm. Paint the house so that it looks beautiful.
