Making a carpet from pompons with your own hands is an exclusive hand-made technique. Fluffy do-it-yourself pom-pom rug What beautiful things can be made from pom-poms
Handmade yarn products always look warm and cozy, you just want to touch them! In this article, we will tell you how to make a pom-pom blanket that is soft, fluffy and extremely beautiful.
A pompom blanket for a newborn will be a wonderful gift from a loving mother, grandmother or aunt. By wrapping the baby in such a miracle blanket when discharged from the hospital, you will take wonderful and tender photos as a keepsake of this. unforgettable day, and in the future, a pompom blanket will warm the baby while walking in a stroller or make his sleep even sweeter at home.

We offer you a master class on making baby blanket from pompoms: she provided us with a photo for him loving mother twin babies Tatyana Denisova. Those who wish to purchase such a cute plaid (for their children or as a gift) Tatyana invites to her VKontakte group.
Do-it-yourself pompom blanket: a master class with a photo. Instruction for beginners
If you are interested in how to knit a pompom blanket, we will correct you a little: these products are not knitted or sewn, but weaved on a special frame. "Knitting" such a blanket is a long and laborious process, although it does not seem so at first glance after studying MK. Stock up on patience and perseverance, because the result is worth it!
So, let's proceed directly to the master class.
Choosing threads for a pompom blanket
To make a blanket for a child, choose the softest and most delicate yarn - 100% acrylic is ideal for this purpose. In the absence of allergies, wool mixture and wool can also be used, but pay attention that your threads are not prickly. In our case, we used 100% VITA Baby acrylic yarn (400 m/100 g): 3 skeins of peach color and 5 skeins of white with colored veins.
Why is it better to use two colors of yarn? This will greatly simplify the manufacture of your blanket: you do not have to count the number of threads to cut when forming pompoms.

Eight skeins of yarn will be enough for you to make a blanket measuring 150x100 cm. If you plan to make a blanket for a newborn, the dimensions will be different - 80x80 cm or 85x85 cm; yarn consumption will be correspondingly less, 5-6 skeins.
Preparing a frame for making a pompom blanket
This stage in the process of making a plaid is preparatory, and usually falls on the shoulders of the male half. To weave a blanket, you will need a wooden frame or a sheet of plywood, along the perimeter of which, at equal distances (usually 4 cm), you need to drive in nails / screw in screws or self-tapping screws. The size of your frame is the approximate size of the future blanket. However, it makes sense to make the frame a few centimeters wider and longer, since the yarn, removed and no longer stretched, will still give some “shrinkage”.
For a blanket 150x100 cm and a standard pompom diameter of 4 cm, 124 nails will be required (as in the photo - 26 in width and 36 in height); with a frame size of 80x80 cm, it is obvious that 84 nails will be required, 21 on each side of the square.

We “knit” a pom-pom blanket: a weaving pattern
The next step in creating your plaid is winding the threads around the resulting frame. This is a monotonous, but not yet the most time-consuming part of the process.
Securely fasten (tie into several knots) the thread on the corner nail and start winding it with a “snake” on the frame: from top to bottom and back, moving from one side to the other; when you reach the opposite side, transfer the thread to the next stud and continue winding in a horizontal direction.
Below is a weaving pattern for a 80x80 cm plaid. For a plaid bigger size the difference will be only in the number of nails (26 and 36 pieces, respectively, for width and length).

Each row - vertical and horizontal consists in the classic version of 50 threads; thus, at the points of their intersection, the number of threads doubles, thus, at the “crossroads” we get 50 * 2 = 100 threads. In this case, wind as follows: 20 rows of thread of one color (40 threads at the intersection), 10 rows of the second (20 at the intersection) and then again 20 rows of the first color (40 at the intersection).
In our case, there were 80 threads in the crosshairs. First, white yarn was wound - 30 rows at the intersection:

then peach, 30 rows in intersection, and again white with veins, 20 rows in intersection:

At the end of the winding, we tightly tie the thread on the last carnation, as at the beginning of work.
We tie the intersections of the threads
Now you have the most difficult and painstaking part of the work - to tie all the intersections of the threads with strong, reliable knots so that the pompoms do not bloom. Be prepared to spend several days dressing. It's great if someone can help you with this!


We cut the threads - your pompom blanket is ready!
The fastest and most enjoyable step in making a plaid is cutting the threads, after which the long-awaited pompoms are formed.
Remember, we wound the threads in layers? This trick will help you trim the threads neatly without counting them. Leave the first layer of threads intact, this is about 1/3 of the wound yarn (we have 30 threads of white yarn with colored patches), and carefully cut the rest in the middle between the intersections. Trim the threads at the edges last so that the blanket is securely fixed until the end of the trimming. Your blanket will look like this when cutting the threads.
From fluffy pompoms, you can make not only a decorative decoration for clothes, but also quite independent subject interior, for example, a pom-pom rug, a pillow, upholstery of a chair, armchair or pouffe. The pompoms themselves are found from different materials, from garbage bags to old T-shirts. But the most popular are pompoms made of threads.
It's very easy to make three simple ways look at the link above. And now let's look at how to make a pompom rug with your own hands.

Necessary tools and materials
To make this blue and white pom pom rug, you will need:
- thick woolen threads for knitting;
- mesh base for the rug;
- scissors.

A little about the base. Plastic canvas is best - a synthetic mesh with large holes. It happens different shades and sizes. The cut edges of such a canvas do not have the property to bloom and crumble.
You can also take a woven canvas size 11 or larger, or stramin - a rigid mesh with large gaps for embroidering panels and tapestries. You can find all this in needlework and sewing stores.
Do-it-yourself pompom rug - work progress
Make pom poms different colors to get a smooth gradient color transition. You can make a plain rug or lay out a specific pattern. You can also play with the size of the pompoms, using large, smaller and very small ones. To do this, see how better way make pom-poms of different sizes.

Now tie each pom-pom to the net, observing color scheme. Try not to see the canvas between the pompoms.

 If desired, the reverse side of the knotted rug can be covered with fabric or knitting so that the pom-pom rug is beautiful from all sides, even from the inside.
- If you could not find a suitable basis - a grid - it does not matter, pompoms can simply be sewn to any fabric.
Designer pom-pom rugs and upholstery

In the same way, various items of interior and furniture can be made from pompons, for example, decorative pillows on the sofa, upholstery of pouffes, chairs and armchairs. Please see what extraordinary accessories pom-poms are made by the German studio MYK! Surely, this bright furniture will inspire you to make your own DIY pom-pom rug!


Decorating the house with elements self made, remember - it is always fashionable, inexpensive and sincere! Creative individuals constantly invent and create original little things using only improvised means. Today, pom-pom rugs have become very popular. A pom-pom rug will undoubtedly decorate any home, it is very warm and soft, and kids like it, as the long pile resembles grass, which can be fun to pull. To make a pom-pom rug, you do not need to have knitting, weaving or sewing skills. Everything is done simply and quickly!
For the rug we need simple materials:
- Woolen threads so that the rug does not prick, choose soft threads for knitting children's things. Such threads are hypoallergenic and it is unlikely that “uninvited guests” will settle in them.
- Two toilet paper rolls
- Scissors
- Mesh base for rug

If you do not find a grid for the base of the rug, then this is not a reason to abandon the idea. Take as a basis a PVC foam mat, which are sold on every corner. They also have holes, plus they are non-slip, you can ask to cut any size. At least make a path out of pompoms!

So, let's start making an amazing rug! Prepare all materials. Grasp two bushings with two fingers and fix the end of the thread between them. Start wrapping the thread around two bushings.

Continue winding the thread. Then pass the end of the thread between the bushings and carefully remove the wool from the bushings.

Make a tight and strong knot. Leave the threads from the knot long.

Holding the skein of thread in the middle, cut the side threads in half. Fluff the pom-pom and cut off the protruding threads, giving it a more rounded shape. Remember to leave long threads from the knot.

Make a lot of pompoms according to this scheme. It's okay if they work out different sizes, so the rug will look even more interesting.

After the required number of pompoms is ready, tie them to the base, passing long threads through the holes. Fasten them tightly to each other.

The rug is ready to use. If desired, cover the back of the rug with fabric, sewing it to the base.

Wake up your imagination, experiment with different yarns and make your original rug in an unusual shape or color. See what fun rugs you can make from ordinary pompoms.
Pompoms on hats and scarves, known since childhood, have now literally received a “second life”.
Pompoms are not only used to decorate children's products; they are used to make toys, flowers for home decoration, rugs and even furniture covers. I want to give some of the most interesting, in my opinion, ideas.
First, about how they do it themselves. There is already an article about this from the "knitting" section. However, here is another way to make pom-poms:
 cut out 2 circles of the same diameter from cardboard with a hole in the middle and make cuts on the side with a width of 2-3 mm.
If, according to your idea, you need not a round, but an oval pompom, then there are 2 ways: “cut” the pompom, giving it the necessary shape, or make cardboard blanks not round, but oval.
 Take the yarn for the pom pom and wind it around 2 circles folded together. Thread the thread through the slot, leaving the slot free. Try to wind evenly.
The size of the pom pom depends on the size of the blank. How fluffy the pom-pom will be depends on the amount of yarn wound. The more, the thicker. And the ratio of the diameters of the outer and inner circles is also important - the larger it is, the more “thick” the pompom will turn out.
 When the middle of the circle is quite densely filled with threads, carefully cut the threads along the edge of the circle.
 Hold the threads so they don't fall out. Tie the center of the pompom with string and remove the cardboard. The pom-pom is ready!
Pompoms can be made using several colors of yarn.
Crafts from pom-poms
Crafts from pompoms will be a pleasant and useful pastime for parents with children. It is not only exciting, but also very useful for development. fine motor skills in children. There are 2 most common "varieties" of children's crafts in this area: animals and fruits.
The following are pom-pom products with a description
Chick
 Kids love this cute, fluffy and bright craft.
Make a yarn pom pom yellow color. The dimensions of the workpiece are the outer circle 5 cm in diameter and the inner circle 2 cm. This will be the body of the chicken.
Make a pompom from yellow threads (it is better to use several shades of yellow at once). The dimensions of the workpiece are the outer circle 4 cm in diameter and the inner circle 2 cm. This will be the head of the chicken.
Make a beak and paws of a chicken from red cardboard according to the model:
Sew the beak to the head (to the fastening thread of the pompom) and black beady eyes
Make 2 holes in the middle of the outline of the chicken legs (with a thick needle or awl).
Sew the details of the chicken as shown in the picture:
To simplify the task or with a lack of threads, you can make a chicken from one pom-pom, it also looks funny!
From several pompoms in a row, you can assemble a cute caterpillar:

Fruit
These, very similar to real fruits, can be made from pompoms:
 Source: http://blog.mrprintables.com/pom-pom-fruit/
Strawberry
To make a pom-pom strawberry, repeat the steps, winding threads of different colors around the blank, in the order and on the other side, as shown in the photo:

If necessary, trim the threads, giving the strawberry the desired shape.
Kiwi
To make a pom-pom kiwi, repeat the steps, winding threads of different colors around the blank, in the order and on the other side, as shown in the photo:


Watermelon
 Lemon
Lemon


A few more pom-pom craft ideas for your creative inspiration:
Flowers
Simple, like all ingenious!

An addition and highlight of the interior can be a pom-pom rug. Soft, warm and cuddly!


When I accidentally saw a plaid of pom-poms on the Internet, I also caught fire with the thought that such a miracle must be done. Immediately there was a lot of descriptions, detailed and not very detailed, as well as pictures finished products, according to which a plan of further actions was estimated.
Well, now I want to tell and show what happened as a result in my photo master class on making a pompom blanket.
I want to say right away that the process of making such a blanket is quite laborious and not fast, despite at first glance - so be prepared to be patient and perseverant. And also be prepared for the fact that it may not be possible to avoid small calluses on tender fingers)))
To make a pompom plaid 80 * 80 cm in size, I needed:
A knocked together wooden frame measuring 90 * 90 cm, along the perimeter of which, at a distance of about 4 cm, small carnations must be driven in. I got 22 nails on each side of the frame.

And of course you will need yarn. In my case, the size indicated above took 5 skeins of acrylic yarn 350m each (100g) and half a ball of thin acrylic threads in the color of the blanket (but you can also use the required number of threads from the above skeins)


And of course, the manufacturing process itself:
We fix the thread on the extreme nail on either side of the row and start with a snake, moving from top to bottom and back to fix the thread, moving from one side of the frame to the other. When you reach the end of the row of nails, then carefully transfer the thread to the next nail, and now we fix the threads not vertically, but horizontally. Thus, we wind all five skeins layer by layer, connecting the ends of the skeins into one thread (a horizontal stack of threads is a vertical layer and again a horizontal one is vertical). We fix the end of the thread by tying it well on the nail.

This part of the process is quite simple and does not take much time.
All the most difficult lies ahead.
Immediately note that you need to leave a certain number of threads for the next stage of production, or choose another skein that matches the color. I took a small skein of thinner thread.

We proceed to the second stage of making a pompom blanket. To do this, cut the thread into pieces of 10-15 cm, and with them we tie each intersection of the layers of threads on the frame. Since I had 22 nails in a row, I got 400 intersections of threads, each of which had to be tied with a strong knot.
It was precisely this stage that I wrote about above, as the most difficult, because, believe me, it is impossible to tie 400 strong knots in one evening, while hands and fingers get tired quite well. Therefore, be prepared to stretch this pleasure for several evenings. It took me a week, despite the fact that I knitted knots in the evenings for two to three hours.

Well, when all the knots have been tied, the third stage remains, which will seem simple and quick to you. All that is required of you is to take scissors and methodically cut the threads between the knots in the center from one row to another, forming pompoms. At the same time, we cut not all the threads, but 2/3 of their parts, since the pompoms should be formed only from the front of the plaid, and from the wrong side there is a layer of threads that form the “frame” on which the pompons will be held.

I left the extreme rows with knots of thread for last, so that when cutting the pompoms, the plaid was well fixed on the frame. At the very end, we cut the layers of threads along the perimeter between the nails - the tension of the threads will be weakened - the pompons will take shape, become closer to each other.

And now the blanket is ready! Fluffy soft pom-poms will please not only you, but also your baby! And of course, it is worth noting that the appearance of the plaid is only admirable!

Video to help
Finished my job today.
Here in such a plaid we will wrap our baby at discharge


To knit such a blanket you will need:
Yarn (I had 10 skeins of 150m -100% acrylic, you can also take acrylic with wool - 2 white, 2 coral and 6 peach. Later I bought another white skein for dressing the intersections)
A sheet of plywood, I have a thickness of 18mm, a size of 80 * 80cm (more is possible, only, accordingly, more threads will go!)
Nails 80mm (in short, I do not advise because the threads will fly off.
Help from a spouse or other male to drive nails into a sheet of plywood (perhaps there are especially gifted ladies who can do carpentry, alas, I am not one of those)
And your desire, patience and of course hardworking hands))
1. I had three shades of yarn. 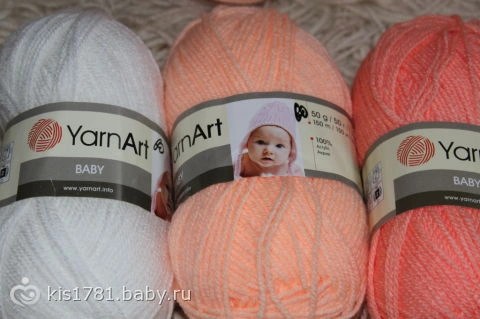
2. Here is a sheet of plywood, the nails are already hammered. I have a distance between the nails of 4 cm, maybe 5, then the pom-poms will be a little larger. And we begin to wind the threads, first rows horizontally, then vertically, alternating. I advise you to start with white threads or any contrasting from the main color of the plaid.

3. Macro.  Wound 20 rows of white yarn, started winding coral)
4. We continue ... after two skeins we wind the main color - peach (well, this is mine, but you may have a different shade of thread) 

 All the yarn has been wound...
5. We bandage all intersections (very tightly, I bandaged twice). At the intersection, the threads are 2 times more.
If you take classic version knitting of this plaid, in total 50 rows should be wound vertically and 50 horizontally, of which 20 rows of the lowest contrast shade) i.e. respectively, at the intersections, 100 threads are obtained. I got more.
 6.
6. After all the intersections are tied up, we proceed to the formation of pompons. We just cut the top 30 threads (to white yarn) - I didn’t get 30, but more, strictly in the middle between the intersections. Be careful, one wrong move and this cute product can be. spoiled. Actually everything! If something is unclear, please contact me.
  Wrong side
Additions to the post at the request of girls - How to remove a blanket from nails
Now let's move on to the next stage of work. We cut our blanket from the nails. We go along the entire perimeter of the frame and where it is marked with a red line in my photo, we cut it in half.

We have completed most of the work, now we are waiting for cutting the pompoms. We take scissors, preferably not very sharp and not blunt))). Scissors also rub your fingers pretty well, so take breaks when cutting. We cut 30 threads from our knots on four sides, without touching the base, otherwise nothing will work.
Now I explain why we took threads of a different color for the warp: in order not to count 30 threads each time, we simply see by color where the warp and do not touch it, we cut only a different color that we wound after the warp.
I also show in the photo exactly where to cut, the red line indicates the place of the cut. That is, we cut the small sides of the resulting squares in the middle.

Thus, we cut our entire blanket and as a result we get such a wonderful fluffy blanket of pompons with our own hands.

1.
2.
3.
4.
5.
6.
7.
8.
9.
10.
11.
12.
13.