Easter basket (crochet). Crochet for Easter. Easter eggs, crochet basket. Schemes, description Crochet Easter baskets
We are all preparing in advance for the holy feast of Easter. And now you can start knitting bags and stands for Easter eggs. In this master class, we will crochet a beautiful and elegant basket. We will knit it in two colors.
To knit a basket we need:
- Yarn yellow and red;
- Green satin ribbon;
- Hook;
- Needle.
Designations:
- St.b.n - single crochet;
- St.S.N. - double crochet;
- S.st. - connecting column.
We will start knitting a basket for the testicle with yellow yarn.
And for starters, let's do two loops. Then we need to knit six st.b.n. We will perform them in the second loop from the hook.

Now let's start adding the circle.
In the first row, we will knit two st.b.n at once in each underlying loop.
In the second, two st.b.n. will be done through one loop.
And in the third circular row, we will knit an increase every two stitches.
Then we will start the fourth row and in it the increase will be knitted every three loops. And in the fifth through four.

Now we have the bottom of the basket ready. We knit a row for the back walls of the loops. And then another row. We already knit it for the entire loop entirely.
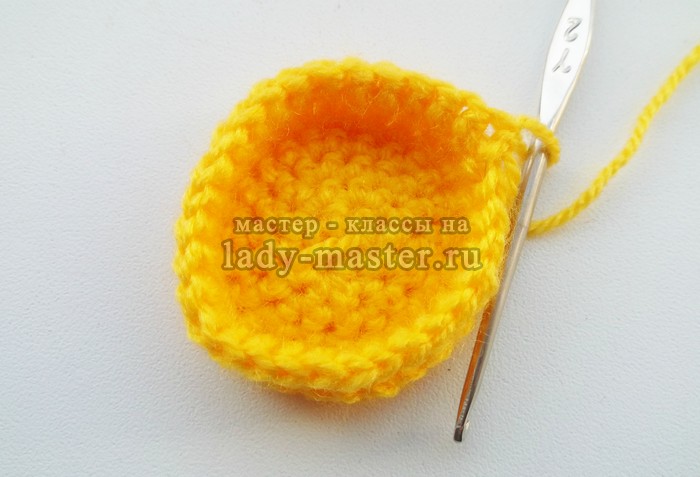
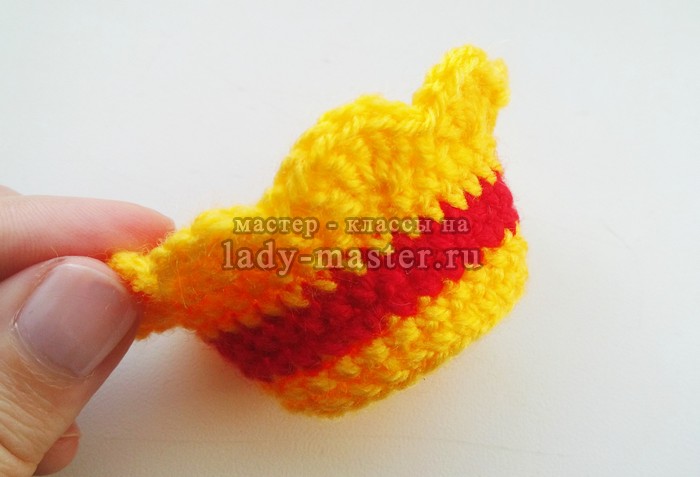
We knit a row of red yarn. And we will make an increase in it every four loops.
The next row is also knitted with red yarn.
And the other two rows will be done with yellow yarn.

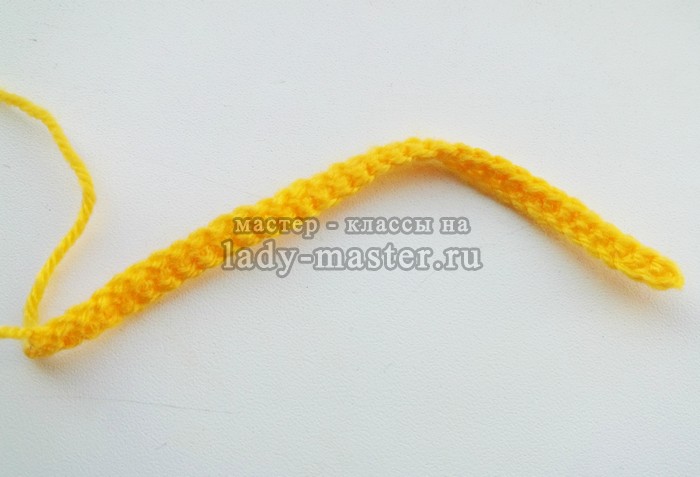
We knit a frill. We will do it with yellow yarn. And we will knit as many as five st.s.n. in one loop. After them, we will skip one loop, and in the second we will perform st.b.s.
And so we repeat throughout the circular row.
Here's a frill we get.
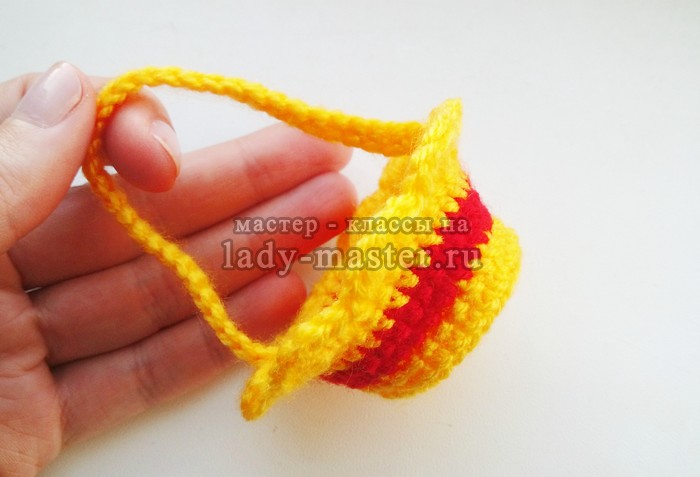
And we will knit only one row of st.b.s.
We sew this strip to the basket so that an arch forms. This is our pen.
And now we will knit decorations in the form of red small flowers.
They knit very easily and quickly. We will make one loop. And then five more. And we will connect with. Art. in our very first knitted loop. We will get a loop from air loops. Now again we will make five loops and again in the same place we will perform the st. Let's repeat three more times. We will make three such flowers.

A cute crochet miniature Easter basket will be a great addition to a present for the bright Easter holiday. You can put a painted egg in it (see article) or a souvenir, or maybe a small toy - or. This basket can be used to store small things. It is soft, so if you fill it with something heavy, you need to consider an additional frame so that the basket keeps its shape. But something small (paper clips, eraser, beads, small toys, sweets or an egg) such a basket will easily hold.
To knit a basket with a diameter of 8 cm from the specified or similar yarn, we knit exactly as described.
To crochet an Easter basket you will need:
acrylic yarn Fiesta Gardenia (100% acrylic, 100 g = 300 m);
suitable size hook;
Crocheted Easter basket: description and diagram
We knit the bottom of the basket with single crochet stitches according to the standard circle pattern, evenly adding 6 stitches in each row. We knit to the desired size of the bottom of the basket.

1 row. Around the amigurumi ring - 6 tbsp. without a crochet.

2 row. In each column of the previous row - 2 tbsp. without a crochet. It turned out 12 loops.

3 row. According to 2 tbsp. with a crochet - in every second loop. It turned out 18 loops.
4 row. We double every third column. It turned out 24 loops.

5 row. We double every fourth column. It turned out 30 loops.

6 row. A row of single crochet with doubling every fifth column. It turned out 36 loops.

7 row. Doubling - in every sixth column. Total - 42 loops.

8 row. We double every seventh column. It turned out 48 loops.

9 row. We double in every eighth column. It turned out 54 loops.

10 row. Doubling in every ninth column. Total 60 loops. We close the row with a blind loop. Bottom crochet Easter basket is ready, now we will knit just up to the desired height.
11-16 rows. 3 vp lifting, a row of double crochets without increments, decreases, finish the row with a blind loop in the third lifting air loop.


17 row. Select handles. Our row is 60 columns, we will select 8 loops for the handles. We calculate the distance between the handles: (60-8x2): 2 = 22, where 60 is the length of the row in columns, 8 is the length of the handle, and two is the number of handles. It turns out that the distance between the handles will be 22 columns.
We knit this row like this: 3 ch. lifting, 1 tbsp. double crochet, ch 8, 22 st. with a crochet through 8 columns of the previous row, 8 ch, 20 st. with a crochet, a blind loop into the third lifting air loop.

18 row. Binding of handles. 3 vp lift, st. with a crochet, 10 tbsp. with a crochet around a chain of air loops, 22 tbsp. with a crochet, 10 tbsp. with a crochet around the next handle, 20 tbsp. double crochet, blind loop in the third ch. lift.

19 row. A row of single crochets to seal the edge.


If desired, the finished basket can be decorated with ribbon, pendants, knitted flowers, bright buttons, beads, etc. Because we plan to use a photo basket in the future, it should not draw all the attention to itself in the frame, so we left it without decor, in the most concise style.


How to compact the basket if necessary
- cut out a strip from plastic or cardboard (the length is equal to the circumference of the bottom, and the width is the height of the basket to the handles) and a circle (the diameter of which is equal to the diameter of the bottom); according to the same dimensions as the plastic or cardboard blanks, cut out the lining (plus seam allowances); make a lining by laying seals between it and the knitted part;
- tie a “whalebone” around the perimeter of the bottom and the upper edge of the basket (used to seal the edge of knitted hats).
Spring is approaching and the brightest and most joyful Christian holiday. Needlewomen take up crocheting for Easter. This exciting activity will take more than one evening, and the variety of options is amazing.
simple egg
Do you want to give unusual gift? Your loved ones will be surprised crocheted. To begin with, let's consider the simplest schemes. For work, we take threads with a density of 50 g per 133 meters and a hook with a size of 3.5. You will also need a filler.
- 1 row: we make 7 columns in a loop and tighten in a circle.
- 2 row: from each loop we knit 2.
- 3 row: just knit each loop.
- 4 row: additions must be done through 1 loop.
- 5 row: we knit all the loops.
- 6 row: we add through 2 loops.
- 7-12 rows: we knit.
- 13 row: decrease every 5 loops.
- 14 row: knit as is.
- 15 row: decrease after 2 loops.
- 16th row: decrease through 1 loop.
- 17 row: make decreases and fill the testicle.
- 18 onwards: Decrease until the hole closes.
The egg is ready. This simple circuit suitable for those who are just taking the first lessons. simple, besides, there are many similar schemes in open sources.
Variations
Crocheting for Easter doesn't have to be boring. Even a simple egg can be turned into a real masterpiece. Create products different colors matching with each other. They can become an indispensable interior decoration for the holiday or a nice gift. Take fantasy yarn “grass”, boucle, or simple, but with sectional dyeing. By interspersing multi-colored pieces of thread, stripes or specks will be obtained. Show your imagination - and a funny picture will appear on the egg.
For clearance finished work perfect fit satin ribbons, lace. Glitter and charm will be added by rhinestones or a small scattering of beads. It is worth sticking eyes and embroidering a mouth - and this is already a revived character. Children can be actively involved in the manufacture and design. They will definitely like to work together with their mother and feel their involvement in the festive fuss.

openwork cover
Such a case can be put on an artificial blank, but it will also work for a real boiled egg. And after the holiday, it can be postponed until next year. This crochet for Easter is thinner, you will need cotton threads and a hook 1.5.
- 1 row: 10 air loops are connected into a ring.
- 2 row: we tie the resulting circle with 14 columns.
- 3 row: we make 10 loops in a chain, then a column with a double crochet, then another 5 loops in a chain. So until the end of the series, and then you need to do 4 air loops and complete
- 4 row: we knit 5 columns into the resulting arch, and from each loop bottom row let's make an increase.
- 5 row: 4 lifting loops, then the double crochet alternates with 2 air loops.
- 6 row: 14 air loops, a column over the 2nd column with a crochet, repeat the alternations to the end of the row. Here you can adjust the size, if the egg is small, knit less air loops.
- 7 row: we make arches from 10 air loops.
- 8 row: arches of 3 air loops. This row is designed to pull off the cover on the egg.
This is very interesting way crochet eggs. Knitting patterns are simple. The only difficulty is working with a thin thread. But you can easily find many more different schemes, experiment with different patterns and create your own unique holiday style that will become your original idea.

Easter basket
The eggs are already ready, and to make them look even more beautiful, you will need a crocheted basket. To make it, you can use any thick thread.
- We connect 7 columns into a tightening ring. Further, all the time we knit for the back wall.
- From each loop we make 2.
- Increase through 1 loop.
- We knit rows 4-9 like this: we make an increase every 2 loops, but more can be done if you want to make a larger basket.
- Decrease after 7 loops.
- We knit rows 11-20 without increments just up - these are the walls of the future basket.
- 3 loops of the chain raise the row, then the basket is knitted with double crochets, with the addition of loops. We do this by alternating 6 columns.
- We knit the fabric as it is, with columns with 1 crochet, we finish knitting.
We make a lapel from the wide part, tied with posts with a crochet. Now it remains to design the handle. We connect 8 loops into a ring, but do not tighten it much, then we simply knit upwards with simple columns until a sufficient length is reached. Sew a handle to the base. For stability, you can insert a wire frame into the last one. An excellent crochet basket for Easter eggs is ready.

Hen Ryaba
Consider more crochet crafts for Easter and knit corydalis.
- In the loop we make 16 columns with one crochet.
- We draw rows 2-4 with simple columns.
- We knit 9 loops in a row with increments, the rest are simple.
- 6-7 rows knit in a circle.
- 4 times we add through the loop, 11 increases in a row, 4 more increases through the loop.
- 3 air loops, double crochet through 2 loops of the previous row.
- In 1 arch we make a column, in the next - 5 such elements with a double crochet.
- From 3 loops we make a column, and in the hole we should get 6 such elements with a double crochet.
- We make rows 12, 13 in the same way, only we knit 7 columns with a double crochet.
- We knit the 14th row, as the 11th.
- We knit the 15th in the same way, only instead of simple columns we use double crochet elements.
With arches we make a tail, wings and a scallop, sew on black bead eyes. The chicken can be put just like that or put directly on the egg.

Easter Bunny
The festive composition will be perfectly complemented by toys for the Easter Bunny, which is not traditional for our country, but is gradually gaining popularity. Cute eared will please everyone. It is very easy to tie it.
First you need 2 round knitted blanks: one is larger, the other is smaller. This will be the head and torso. They knit according to technology simple eggs, only with a uniform decrease. To calculate correctly, you can read the diagram in the opposite direction. Don't forget to leave a hole for stuffing. The ring is pulled together last. Threads can not be hidden, but left long for subsequent stitching of parts.
Small parts of a rabbit
To tie the paws, we start in the same way.
- 1-3 rows - repeat the old scheme.
- We make 8 additions of loops in a row, the rest we just knit.
- We knit rows 5-6 as is.
- We make a decrease through 3 loops. Then - through 2 loops. The paw is ready.
We also knit 3 more blanks and create another one slightly smaller for the tail.
What is a rabbit without ears? The basis is a chain of 12 air loops. Next, we make 5 half-columns and 7 columns, turn the work and knit everything in the reverse order.
The last step is to connect all the details into a single whole. We attach eyes to the rabbit and embroider the nose. The cute Easter bunny is ready.

Crocheting for Easter will bring the whole family together in preparation for the holiday and help create a bright and joyful atmosphere at home. Lots of different ideas and patterns will help to decorate in an original way festive table to surprise your guests.
So original Easter egg baskets they knit very quickly, so if you are engaged in needlework, by the holiday you can easily have time to impose them as much as you like - so that there is enough for gifts for all relatives and friends.
================
Materials:
- (75% wool, 25% acrylic) about 10 g blue (yellow, lilac), a little yarn in a contrasting color (for finishing),
- hook number 2.
Artwork description: How to knit baskets for Easter eggs (2 parts)
Dial a chain of 6 ch. and close it in a circle of connection.
1st row: 3 vp lifting, 1 st.s.n. in the resulting ring, 3 vp, 2 st.s.n. in the ring, 5 v.p., 2 st.s.n. in the ring, 3 vp, 2 st.s.n. in the ring, ch 5 A row to finish the connection. in the 3rd v.p. lift.
2nd row: 2 - 3 conn. Art. approximately to the middle of the chain of 3 ch. previous row, ch 3 lifting, 1 st.s.n. in the same arch from v.p. of the previous row, 3 ch, 2 st.s.n. in the same arch, 4 v.p., 8 st.s.n. in an arch of 5 v.p. previous row, 4 ch, 2 st.s.n. into the next arch from 3 ch. of the previous row, 3 ch, 2 st.s.n. in the same arch.
7th to 10th row knit half of the handle of this basket detail. Attach a new thread on the other side of the part and tie the second half of the handle.
Attach a new thread to the base of the basket (to the 1st row) and in the same way (from the 2nd to the 6th row) tie the second part of the basket and the second handle (2 times from the 7th to the 10th row).
Assembly: fold the parts with the wrong side inward and connect them together in a circle according to the strapping pattern, and in the center of the basket handle to perform st.b.n. insert the hook into all 4 upper arches separate parts pens.
Tie a chain from ch. of arbitrary length and pass between the arches, as shown in the photo.
Such baskets great gift friends and relatives. And to please yourself, your beloved, contact us!
If you did not have time to prepare a gift for the holiday with your own hands, use the flower delivery service in Moscow http://www.zakaz-buketa.ru/ - after all, get from loved one a bouquet of fresh flowers is always nice.
This page is found by queries:
- crochet easter egg baskets
- crocheted easter egg baskets
- crocheted baskets for easter eggs
- knitted basket for easter eggs