Step by step nail extension step by step. How to build nails at home with acrylic, gel - step by step instructions. How to properly and quickly grow nails at home? Gel nail extension on tips: instructions and techniques
Nail aesthetics is a very entertaining process. Many girls want to learn this business for commercial practice or to save money on constant visits to salons. But before you master gel nail extensions, You should definitely watch the video of already experienced masters who are happy to teach beginners. It is not only entertaining, but also absolutely free.
If you have a talent for drawing, be sure that you can learn how to do a manicure without special courses. The only thing that needs to be taken into account is the upgrading of qualifications. Master classes and conferences will help you with this, where you can find out trends, popular manicure variations and, of course, the secrets of masters that they will never show on video.
Procedure specifics
You can learn everything yourself, there are no impossible tasks. Many famous masters started their career by listening to videos and reading special books. If you are interested in nail extensions, first of all, take care of the necessary materials. You will not be able to make an elementary coating without a special brush. You should also pay attention to the quality of covering funds.
Never do not choose cheap analogues of well-known gels and varnishes. Otherwise, you will get a manicure that can simply crack and crumble in a few days. If you decide to master gel nail extensions, and the step-by-step instructions on the video show a master who uses low-quality materials, urgently change the channel.

Many self-taught people find it difficult to perform the necessary actions at first, in which case ask someone to insure you. For example, when you need to quickly place both hands in or apply a coating on all nails. You will just need it only after a few trainings you will be able to do everything on your own. But in order to master gel nail extensions at home, you must definitely watch thematic videos. Only in this way you can see all the nuances and secrets of correct execution.
Practice and experience. They will make you a professional. A novice master needs to do up to ten procedures a week. So feel free to call your friends and get down to business.
Videos and master classes. Is it really possible to learn like this?
Constant viewing of videos can replace full-fledged courses. The only thing: to master nail extension with gel, for beginners it is recommended to choose instructions where this process is shown step by step on the video. Only in this way you can see the movements of the master and try them yourself.
 On the net you can find quite a lot of well-known video courses on this topic. They are watched by both beginners and experienced masters. Scroll through the ads and posters of your city. If soon a master class on nail aesthetics is planned, you need to attend it. There you can hear valuable advice about working with nails, as well as ask questions of interest to already professional masters. They will tell you how to do gel nail extensions in a constant rush and influx of customers, which you definitely will not see in the video.
On the net you can see a huge number of videos showing how hands are transformed due to gel coating. If you watch them carefully, you can catch all the details. Ask your friend the master about whether he watches a video about manicure. The answer will be positive, because any experienced person always improves his knowledge.
Video tutorials for learning to build nails at home
You need to start work with the preparation of the nail. You should not only have skills, but also . It can be an automated device or a regular nail file and a manicure set. But to save time, it is better to use special devices. Any video tutorial on gel nail extension for beginners begins precisely from the stage of cleaning the cuticle and the surface of the nail.
If you decide on self-building, select the right number of forms. With their help, you can make the length of the nail plate. Before doing this for the first time, you need to watch the video tutorial, because gel nail extensions on molds are very difficult to do without instructions. The coating quickly loses its shape, only organized and fast work will give a positive result.
Tips - an imitation of the nail, which is attached directly to the nail plate. it not at all a false manicure, as inexperienced masters think. The most popular gel nail extension in this technique is French on tips, the video below perfectly shows all the nuances of execution. At home, this manicure is quite easy to do.
Many masters are interested in the question of the correct selection of material and types of gel. What is the difference between single-phase gel nail extension and three-phase, you can look at the video. If you look, then there are no big differences, having tried both options in the work, you will see similar results. The video shows nail extensions with both samples, the three-phase gel differs only in its components.
Usually used by beginners in their work. This coating is not so reliable, but it is very fast. The three-phase version is more difficult, but is attached to the plate much better.
Time savings are possible thanks to improvised tools that greatly simplify the manicure process. These include the top forms for gel nail extensions, which you can see in the video. Them not often used in professional salons, but at the beginning of a master's career, this is excellent training.
Modeling the shape of the nail plate is an obligatory moment in the work. From this depends on the aesthetics and well-groomed manicure. The best way to make a beautiful shape is arched nail extension with gel, which you can learn after watching the video.
What if the client has short nails? This question can be heard very often, many people think that short gel nails are very difficult to do, which completely refutes the following video.
The uniformity of the layer and the protection of the plate depend on the density of the gel. Gel-jelly nail extensions, which you can see in the video, are innovation in the field of manicure. You yourself will note the comfort in work, having tried such material.
As you can see, on the network you can find all kinds of videos that clearly show the process of performing a manicure. The main thing is the desire to learn, only then you will be able to master gel nail extension both for yourself and for other people, watching videos and attending relevant conferences will help you with this. If you do not want to spend time looking for themed events in your city, you can watch a master class where gel nail extensions are discussed on video. But you need to take into account, so you will not be able to ask questions to the master. Do not waste time, try to make your first manicure right now!
Nail extension allows you to get nails of any length in a matter of hours. Many girls resort to the services of a salon, but you can make beautiful nails at home. We will tell you step by step how to properly build up nails with shellac and gel, what they are.
Basic Rules
To get a beautiful coating, you must first do a manicure, then it remains only to follow our recommendations. Before you carry out nail extension, you should treat the entire surface of a natural nail. It is necessary that there is not a single section, otherwise it will cause delamination. You should not make very long nails, as you will get tired of adjusting them. Before applying the gel, a specific stencil should be used.
- We first apply the gel on the upper half of the nail and lengthen the shape with a stencil to the desired size. Next, the extended nails are dried under the lamp for one minute.
- The second layer of gel should cover most of the area, leaving about three millimeters near the cuticle area. The new layer is also dried under the lamp.
- We carefully remove the stencil and take a manicure nail file, giving the necessary shape to future nails. The third layer of the gel must be applied in the middle of the nail plate and spread in all directions so that a “bump” appears. It allows you to create an arc of the nail. Now the hand should be turned palm up and hold it for about 30 seconds in this position. To fix the effect, dry the nails for three minutes in an ultraviolet lamp.
- It remains to apply another layer of gel. It should be applied with a thin ball, but before that, the residual shape of the nail should be done with a nail file. Next, apply a special tool with a nail file and dry. In order for your manicure not to turn yellow in the future, it can be coated on top with ultraviolet light. After the end of the procedure, you can apply a regular hand cream on the skin near the nail plates. Try not to touch the water for about an hour after the procedure, otherwise this may adversely affect the quality of the work done.
If over time you still notice the detachment of the first ball, this may indicate the presence of pregnancy or the use of potent medications. In this case, everything depends solely on the individual characteristics of the female body.
 Many girls are wondering how to grow nails at home. Of course, this skill requires training, but if you do not have the opportunity to enroll in courses, you can take video training. Master classes tell in detail how to grow nails, so you can handle this task. To get started, get all the necessary tools, nail files, gel, primer, top, forms and an ultraviolet lamp.
Nail extensions can also be done on tips or use the acrylic extension technique. In any case, familiarize yourself with various techniques, and choose the most optimal for yourself. Any extension begins with a manicure. Choose a form and start the process. Then dry your hands thoroughly, because the build-up should be done on dry hands.
Nail extension includes several stages: preparation of the nail plate, gel application and nail shaping, as well as design. Before you build nails, you need to decide on the design.
Especially popular is the extension of toenails, and no wonder. After all, extensions can completely change the shape of nails and give them a fresh look. Moreover, the gel protects the natural nail from breakage, which means that you can go through with a flawless pedicure for a long time. Often girls grow toenails when they are going on vacation. Indeed, on vacation there is absolutely no time to take care of your nails, and it is easier to take care of them in advance. The most commonly used extensions with french pedicure.
 Many girls prefer nail extensions with biogel or acrylic. Today we offer to consider gel nail extension with step by step instructions, photos and videos for beginners. Nail extension on tips with step-by-step instructions will allow you to quickly get beautiful, long nails at home.
Step-by-step instruction
Gel nail extension step-by-step instructions with a photo recommend starting with a regular manicure. All nails must be of the same shape and length, varnish must be removed from them, the cuticle is pushed back with an orange stick or a special spatula. Now you need to polish the nail coating with a buff, using a brush to remove dust.
When building nails on tips, the step-by-step instruction recommends degreasing the nails with a primer or other means, using lint-free wipes or a brush. After carrying out such a procedure, it is forbidden to apply cream on your hands or wash them - now the nails should not come into contact with anything other than the materials necessary for building up.
If you build nails on forms, then each of them should be gently but tightly bent to the nail so that it holds well and does not fall off.
So, the preparatory work is completed. Now we start building nails using gel. The step-by-step instruction assumes the next step is the application of an ultraviolet gel. It should be applied in small portions, starting from the base of the nail plate, distributing evenly along the entire length of the nail. Next, the nails must be dried under a special lamp and the gel is applied again. This time the gel is applied already to the required length of the extended nails. To obtain the same length of all nails, it is recommended to use special marks made on disposable forms. The gel applied along the entire length is dried again with an ultraviolet lamp.
 After all the nails are done and well dried, you need to carefully remove the paper forms, being careful not to damage the new coating. Next, using a nail file, the shape of the nail is corrected. That, in fact, is all - nail extension using the gel is completed. Such a step-by-step instruction will help every girl, even inexperienced in matters of nail art, to make a correct and beautiful manicure on her own.
Using gel for nail extension allows you to level the surface, giving the nail a beautiful shine without causing irritation of the skin around the nail and cuticles. The technology of creating false nails at home allows you to get beautiful nails that look like natural ones, spending several hours on it. How gel nail extension is carried out, a step-by-step instruction with a photo will help you figure it out.
Varieties of nail gel
Step-by-step building includes several phases that you need to know before gel nails. The three-phase variety includes three components distinguished by their functionality. The materials used for the first layer are responsible for the safe contact of the nail plate with the artificial turf, creating maximum adhesion. The second is modeling the body of the nail. The third layer creates strength, protecting the nail from the negative effects of external factors, providing a smooth and shiny surface.
Gel nail extension, step-by-step instructions with a photo on a two-phase system, happens differently. One of the components is necessary for modeling and adhesion, the second is responsible for the final strength of the nail. The single-phase system uses a versatile material like acrylic, it has all the properties you need while providing strength, styling and grip at the same time.

Extension methods
Before you build gel nails, you should decide on the available methods for the procedure. Building is carried out on forms and on tips. Nail extensions on tips are artificial nails that differ in size, color and shape. They are glued to the natural nail plate and covered with extension gel. Ultimately, the tips become part of the resulting nail. This extension option is suitable for everyone, you can use it even with your very short nails.
Carrying out building up on forms (upper or lower) is carried out somewhat differently. With this method, a special plate is attached to the nail, on which the gel will be applied in the future. After the build-up, the form is easily removed from the nail. The main advantage of this method is the high naturalness of such a manicure, and, extended in this way, is much easier than when building on tips.
Materials for nail extensions must be of high quality, because they are the key to the success of creating a high-quality manicure. Looking through the list of extension gels, you need to choose those that do not contain harmful substances.
Nail gel
When choosing what to build up, special attention should be paid to the gel, because this is the main material in this technology. Under the influence of an ultraviolet lamp, the gel tends to harden. Often such a base is called a living polymer, due to the fact that it does not suppress the normal biological processes in natural nails, giving them the opportunity to breathe.
Such materials for nail extension have many advantages:
- the gel is not able to cause irritation on the skin;
- due to the gel, the nail surface is leveled, the nails acquire a natural look and begin to shine;
- the gel applied to the surface of the nail is able to level itself, spreading in the right direction along the nail plate.

Tips for building
Tips designed for nail extension days are plastic templates that are glued to the surface of a real nail with a special glue. Further, using a special polishing and a nail file, the boundaries between the artificial and natural nails are aligned.
You can reduce the length of tips using special tweezers, and if necessary, adjust their shape, it is recommended to use a nail file. It is extremely important that the tips you choose are resilient, able to withstand certain loads and fit perfectly into the shape of your natural nail. To date, the most popular shapes are oval and square nails.
Nail cleaner
You should also always remember that before sticking tips on nails and applying gel, you must use a cleaner. This substance is a special degreaser designed for natural nails. With it, you can clean your nails, disinfect them before starting modeling. Also using the cleaner, you can remove the sticky layer from the nails after the gel dries.
These are the main, but not all, materials that you will need for nail extensions.
If you decide to do a pedicure, gel polish is better than nothing as a base. It lasts much longer than a regular surface, and most importantly, it allows you to make a unique and interesting design. Now decorating nails with stones is becoming especially fashionable; in combination with monochrome gel polish, the stones will look great if you decorate the big toe nail with them. Lunar manicure is not inferior in popularity, especially since experts offer girls different types of holes. You can make the usual standard or choose a curly one, you can leave the natural color of the nail or cover it with a contrasting gel polish.
If your nails are not as strong by nature as you would like, you can purchase a pedicure gel. The gel is saturated with protein and calcium gives all its properties to the nails, reducing the layering. Moreover, this coating is the best suited for holidays. I eat not afraid of not salty water, not the scorching sun. No matter how hot the temperature is, the bio gel will not lose its appearance and will not become cloudy. In order to apply a bio gel, a UV lamp is needed, because without it the gel simply will not dry on the nails. Bio gel is also called fruit acid, so you can find it in the store under that name.
Acrylic is a combination of liquid and powder. We offer to consider acrylic nail extension, video tutorials for beginners, and step-by-step instructions will allow even a beginner to deal with this. There are two methods: creating nails on forms and on tips. On the forms, the nail plate is created directly from polymeric materials. This technology has a number of advantages, namely: the strength of the material, protection from the negative effects of the environment, a long period of wearing nails (up to 4 months).
Minuses
Before you build acrylic nails, you need to know about some of the disadvantages that this material has. Video tutorials on acrylic nails for beginners will help you find out that a material such as acrylic is toxic and has an unpleasant odor.
As you can see in the photo, as starting materials you will need: acrylic itself, a liquid that increases the adhesion of an artificial nail to a natural one, a nail file, a brush, a degreaser and a solvent. You can buy it at any specialized store. The purchased materials will last you for a long time, so the money spent can pay off extremely quickly.
Building on forms
If you are a beginner, then before you build acrylic nails, you should stock up on forms. This way is more simple. Wash and sanitize your hands before starting extensions. Get a manicure, trim your nails with a file. Using a grinder, walk along the entire length of the nail, remove dust from the nail plate and near it. Apply a special cleanser, wait for it to dry completely.
Attach the shape and glue its ends, thereby creating the future nail. Next, pour the liquid into a container, dip the brush into the monomer. We wring the brush well from the liquid so that it is almost dry. Now with a brush we collect a ball with camouflage powder. In appearance, it should resemble a hedgehog. If the ball is wet, then you will not be able to work with it, the acrylic will simply spread over the entire nail.
Wait until the ball is completely saturated with liquid, then apply it to your form. Now you need to roll it over the cuticle area and the whole shape, retreating a millimeter from the cuticle itself. We create the necessary shape of the nail. That's all, in a similar way we perform all the nails, dry the nails in an ultraviolet lamp, cover the top with a final coat.
Nail extension with glue powder consists of three main stages. In total, the procedure takes no more than an hour, the total duration of the manicure depends on the complexity of the final painting.

Main steps
Nail extension with glue powder is made in 3 main stages.
- At the first stage of the extension, the master prepares the nails by fixing tips (artificial nails) on them. It should be noted that such manicure technology always involves the use of tips, it is not carried out on natural nails.
- The second stage of the manicure consists in applying special glue to the tips and dipping the nail plate in powder. It is necessary to repeat this action several times until the nail acquires sufficient density, after which an activator should be applied to its surface, which will fix the layers of powder, while making the nail smooth.
- At the final stage, the master carefully adjusts the shape of the nail plate and cuts off excess powder.
After these three stages, you can start drawing a picture.
Nail extension with fabric allows you to build up with linen, silk or fiberglass (a fabric that looks like silk and is based on fiberglass) nails of various shapes and lengths. The principle of the technique lies in the fact that tips (a plastic nail) are glued onto your own nails, on which layers of tissue are glued.
Benefits of the procedure
Nail extension with fabric has a number of advantages, due to which it can be used as an independent method of nail extension. The main advantages of the methodology are as follows.
- Nails extended according to the fabric technique are quite shock-resistant and elastic.
- A damaged nail is very easy to repair - a new layer of tissue is simply attached to the crack.
- The procedure can be carried out using various fabrics - extensions with fiberglass, linen, silk, depending on the desire of the client.
- Due to the presence of a variety of colors and textures of fabrics, you can get different patterns on the nails, which allows you to get rid of the use of constant coating.
- Nail extension using a fabric coating is the most hypoallergenic and almost incapable of causing an allergic reaction.
Is it acceptable to combine acrylic and gel when building nails? Most customers are afraid of this mixing of materials. However, in fact, there is nothing wrong with this - it will not affect the quality of extended nails at all.
general information
The combination of acrylic and gel has been used by craftsmen for a long time, because the chemical basis of these two materials is completely identical, they are both polymeric. The main thing in this case is adhesion to the nail plate (of one or another material). And already the combination of various materials affects the quality of the finished nail.
If you like modeling nails with gel (or it is used because of problem nails), but you want to make acrylic modeling, then the master lays out the substrate and the nail plate from the gel. In this case, the background can be made of acrylic, after which acrylic molding is added and the nail is sealed with gel or acrylic.
In this case, crimping the nail is mandatory. The same sequence of work when creating a French manicure - in any kind of combination, the materials will perfectly interact with each other.
Doing a fresh manicure every day is very difficult, given how modern life is prone to haste. An excellent way out of the situation would be to build up the nail plate with a gel. This service is available in almost any beauty salon, and more recently it can be easily carried out at home. Using materials of artificial composition, you can give nails any length and shape, as well as emphasize natural naturalness.
Required Tools
To perform a procedureyou will need the following set of tools:

Necessary materials
In order to grow nails, you will need the following materials:


If desired, the nails can be decorated:
- camouflage gel - a variety of colors are available;
- gel compositions of different shades;
- white gel;
- and brushes - allow you to apply any pattern on the surface of the nail;
- jewelry like stones, rhinestones and tinsel.
Extension methods
You can perform the gel nail extension procedure in the following way:
- On tips- artificial nails, which may differ in shape, size and color scheme. After gluing the tips to your own plate, you should cover them with a gel designed for building. A great way that is ideal for all categories of women. It is even possible to build on very short nail plates.

- On forms- forms are of the lower type and the upper. After attaching a specialized plate to your own nail, the surface should be treated with a gel base. At the end of the procedure, the form is quite simply removed from the resulting nail. The main advantage of this type of extension is the natural naturalness of the plate.

How to grow at home
Today, it is quite possible to carry out the extension procedure with your own hands at home. To make the process as accessible as possible, you can use the step-by-step instructions below:

What a novice master should know about the intricacies of the nail extension procedure
Do not be deceived by the apparent
ease of performing the procedure for nail extension. As in any business that requires precision, professionalism and attention, there are subtleties here that you simply cannot do without.
In order for the client to be satisfied with their long and beautiful nails, it is necessary to clearly fulfill all the requirements for the nail extension procedure.
If you want to improve the condition of your hair, you should pay special attention to the shampoos you use. A frightening figure - 96% of shampoos of popular brands contain components that poison our body. The main substances, due to which all the troubles, are indicated on the labels as sodium lauryl sulfate, sodium laureth sulfate, coco sulfate, PEG. These chemical components destroy the structure of the curls, the hair becomes brittle, loses elasticity and strength, the color fades. But the worst thing is that this muck gets into the liver, heart, lungs, accumulates in the organs and can cause cancer. We advise you to refrain from using products containing this chemistry. Recently, the experts of our editorial staff conducted an analysis of sulfate-free shampoos, where the first place was taken by funds from the company Mulsan Сosmetic. The only manufacturer of completely natural cosmetics. All products are manufactured under strict quality control and certification systems. We recommend visiting the official online store mulsan.ru If you doubt the naturalness of your cosmetics, check the expiration date, it should not exceed one year of storage.
Personal hygiene requirements for nail extensions
- First of all, this is the strictest hygiene of nails and hands, both for the client and the master himself. Cleanliness of the hands before starting the build-up is the main key to success. As a rule, an artificial nail extended on the nail plate stays there for three weeks, and in case of dishonest treatment, an infectious process may occur, leading to very disastrous results.
- The hands of the master and the client must be thoroughly washed with special detergents, and then treated with disinfectants. A characteristic feature of such agents is the effectiveness of action against dermatomycosis, hepatitis B, human immunodeficiency virus and other viral pathogens that pose a danger to human health. These fast-acting disinfectants include bacillol, sterillium, cutasept, and others.
- During the entire extension procedure, the master should have clean napkins at hand. After each client, the instrument must be thoroughly washed and disinfected.
- The work table must be kept clean and tidy. All chemicals must have tight-fitting lids for their containers.
- Lighting also plays an important role when working with clients' nails. The light must be bright and focused so that the master can quickly evaluate the results of his work.
So, how to start building nails?
First of all, there are special courses where professional instructors will competently teach the technique of nail extension, reveal the main secrets, and also point out the existing mistakes.
Then, there are a huge number of video tutorials on nail extension. They very competently show what kind of material is recommended to use, and what nail extension techniques exist.
The most popular of them will need to be remembered or written down in order to, if necessary, recommend to the client.

Before starting work, it is necessary to carefully familiarize yourself with the types of materials that will be needed for work. Mainly you need to pay attention to acrylic, gel and silk. At the same time, it is necessary to know that the use of one or another material depends on what exactly the client wants.
Acrylic is used for strength nails, which remains intact even with fairly severe impacts on the nails.
Gel nails are less durable and may crack on impact. But the gel creates a color as close as possible to the natural color of the nail.
Silk is most often used to repair nails.. They cover a cracked nail, applying a gel on top.
Nail extension is carried out in the same way, regardless of the material used for this. In the process, either special forms are used that are placed under the nail, or plastic plates are used. They are usually glued to the nail, applied when the free edge of the nail is missing or with very brittle and thin nails.
Nail extension technique
Before starting the extension, the upper fatty layer of the nail is removed with a coarse-grained nail file. This is necessary so that the artificial nail is well fixed. Then, with the help of special glue, tips are attached to the edges of the nails, on top of which gel or acrylic is applied.
In the case of nail extension without the help of tips, the material is applied directly to the nail. Acrylic hardens naturally, and gel nails are exposed to ultraviolet radiation using special lamps. After complete solidification, the nails are polished, giving them the required shape, and, at the request of the client, varnished.
Quick dry nail polish

Equipment designed to accelerate the curing of the material used in artificial nail extensions belongs to the category of lamps for quick drying of nails. These lamps are designed to cure gel, acrylic and top coats thanks to their conveniently integrated palm and foot rest. They significantly speed up the drying of the varnish thanks to the built-in fan, and the built-in timer allows you to adjust the glow time.
Due to their compactness, the lamps occupy a very small area of the desktop. They have found their wide application both in large beauty salons and in private workshops. The lamps are very easy to use, and almost all of them are equipped with a cover that protects the eyes from ultraviolet radiation.

Every beginner master needs to have an idea about the most practical and common forms of the nail edge. Most often it is an oval, square, pipe, almond or stiletto. Each shape is special, comfortable and beautiful in its own way. Of course, the master can only offer the form to his client, and she herself will have to choose, based on practical and aesthetic considerations.
An important aspect is the length of extended nails. With longer nails, there is more room for the development of the master's imagination when performing artistic modeling or painting. However, not every woman can afford to have long nails due to her profession or work performed at home. First of all, she should be comfortable and comfortable.
Short nails show beauty and neatness, they are more practical for everyday activities. Therefore, the more active the daily activity of the client, the shorter the length of the extended nail is chosen. The most optimal length is from two to five millimeters.
Caring for extended nails

Of course, every woman who has undergone a nail extension procedure cannot wear them indefinitely, so she needs constant adjustment. Due to the fact that artificial nails are much denser than natural ones, a fairly noticeable line between the first and second appears during regrowth. This shortcoming is simply corrected in the correction process.
For this, there is a special modeling tool that is applied to the overgrown part of the natural nail. Almost always, the same material is used for correction, from which the extended nail was previously made. The master must be aware that in the process of regrowth, a shift in the center of gravity in the artificial nail may occur, which will lead to damage to the natural one. Therefore, the center of gravity must be returned to its original position during the correction process.
Video: how to care for extended nails?
What a novice nail artist needs to know about nail extensions

You need to know that it is not necessary to do a manicure before nail extension, since the cuticle should not be damaged. The best time to do this procedure is three days before or after extensions.
Nail polish applied to artificial nails lasts much longer than natural nails. The reason is that the artificial coating is not able to release liquid, leading to peeling of the varnish. You can remove varnish from artificial nails with the help of special products that do not contain acetone.
There are contraindications for nail extension
These include: pregnancy, taking hormonal drugs or antibiotics, as well as diseases such as diabetes, intestinal disorders and fungal nail diseases.
Tools and materials for nail extension
- Hand sanitizer (200ml)
- Nail files 80:100 and 100:180 (2 pcs each)
- ultraviolet lamp
- Encryption block
- Brushes for coating materials
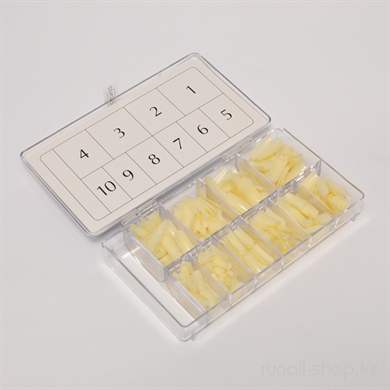
- tips
- Tips cutter
- Glue for tips
- Forms for nail extension
- Brush for removing dust from the nail surface
- Glue for tips
- Gel Coat, Acrylic, Silk Coat
- Manicure tools (scissors, bath, cuticle spatula,
- tip dissolving liquid)
- Cuticle oil
- Materials for decorating nails
Unfortunately, not all women have endowed nature with strong and durable nails. This issue is easily solved, one has only to visit a beauty salon and use the nail extension service. This process can also be done by hand. We will consider two types of gel extensions: on tips and forms. We will also briefly talk about the types of extensions in the French style with visual photos. And, if you have no desire to visit the salons, then our article will tell you about gel nail extension step by step.
What to choose: forms or tips?
Nail extension can be carried out using forms or tips. When there is a nail base on the finger, tips must be used. In order not to make a mistake in the right choice, you need to take into account the width of the nail surface, what kind of bend you want to get at the end of the work and do not forget about the height of the nail hole. When we talk about using gel extension molds, we mean recreating from scratch the length, shape that you or your client prefers, not forgetting to take into account the structure of the nails and the size of the fingertips. When the type of work that suits your client has been chosen, you need to know that there are five types of nail structure:
- slightly convex;
- snub;
- flat;
- cat's nail;
- wavy.
The most common are cat's nail and snub-nosed nail growth.

"Cat's Nail"
Cat nail extension should not be carried out on tips, since with the growth of the nail, its free edge will bend down. This will create a space between the tip and your nail, making it possible for dust and water to get in. In this case, you need to use the form for nail extension.

"Snub" nails
If you work with snub-nosed nails and decide to build on the forms, do not be surprised that in the future the nails will lose their correct structure. And in this case it is better to use tips.
The final result of gel extension also depends on the chosen type, one of which is used most often is a three-phase gel extension:
- Base gel
- Construction gel
- Finishing - gel polish

Nail extension at home
In order for your work at home to be harmonious and complete, you need to stock up on these tools, they can be purchased at ruNail:
- UV lamp;
- antiseptic;
- modeling agent - adhesive;
- the foundation;
- degreaser - dehydrator;
- tips;
- forms;
- sculptor;
- clinser;
- flat brush;
- file 220/280 grit;
- file 240 grit;
- finishing gel;
- glue for tips;
- lint-free wipes;
- orange sticks;
- dust brush
- cuticle oil.

Step by step instructions for beginners
Gel nail extension on tips:
- We prepare the nail surface with an orange stick: peel off the cuticle, create the desired shape for the freed edge, and polish the nail area with a rectangular file 220/280 grit, it prepares the nails for polishing, smoothes and eliminates scratches.
- Apply a degreaser
- Apply a thin layer of glue for tips on the freed edge of the nail and the contact points of the tips. It is necessary to attach the tips to the nail at an angle of 45 degrees, and let it go so that the line of the foot of the tip and the edge of the nail are aligned.
- Further, without disconnecting, gently lower the tips on the nail and spread the glue in the same amount over the entire area with smearing movements.
- Again we put the tips at an angle of 45 degrees, bring them to the stop line and after the heard crackle, gently lower the tips onto the nail. It is necessary to hold for about 10 seconds.
- We shape the tips at the request of the client, taking into account the structure of the nail.
- We get rid of dust particles and degrease.
- We cover with a modeling agent on the area of the nail.
- With a slightly damp brush, apply the base gel along the entire length of the future nail and put your finger under the lamp for 1 minute.
- Using a flat brush, apply the sculptor, taking into account the structure of the nail. Leave under the lamp for three minutes.
- Remove the sticky layer with a lint-free cloth.
- With the help of a buff, we pale the area of \u200b\u200bthe nail.
- Degrease and cover with a finishing gel. Again, put your fingers under the lamp for three minutes.

Below we offer you video tutorials on building:
How to build gel nails on forms
- We treat our hands with an antiseptic.
- We clean the surface of the nail with a 220 grit file.
- Cover with degreaser.
- Next, cover with a base and put your hands under the lamp for two minutes.
- We clean the top layer.
- Fixing the form.
- Using a brush, apply the gel, while turning your finger down with your nail so that the gel is evenly distributed.
- Again, put your hands under the lamp for three minutes.
- Cover with gel again, form an “S” bend.
- After the lamp, clean the sticky layer.
- Getting rid of the form.
- Level the surface with a buff.
- We clean the dust with a brush and cover with a finishing gel.
- Again, put your hands in the lamp to dry for two minutes. Degrease the surface of the nails and cover the oil on the cuticles.
Below we propose to consider a step-by-step extension in photos and videos:


Ageless jacket
Under each type of jacket, you can see the finished work in pictures, as well as a video on design:
- french millennium
