Schemes category. Snowman from modules Christmas modular paper origami
We will send the material to you by e-mail
How to revive paper? This can be done not by a wizard, but by ordinary people through the ability to fold and bend a sheet of plain paper. This technique, which breathes life into paper, is called origami. The editors of the online magazine site offer to make origami for the New Year with your own hands and decorate the festive decor with these voluminous products.
What interesting origami crafts of varying complexity can be made from paper for the New Year
New Year's decor implies that all handmade products will bring a festive mood to the interior. For this to happen, they are determined using origami models. You can put a colorful postcard with a voluminous folding Christmas tree on the table, or you can decorate the walls with interesting garlands. Origami Christmas decorations also look beautiful and unusual.
Origami in the form of a postcard
This task should be given to the child. The technique of work is not particularly difficult, but you will have to supervise the process. These will be positive emotions that must be shared with each other.


Related article:
DIY New Year's cards: scrapbooking, quilling, origami, fingerprints; postcards for the New Year from improvised materials: buttons, threads, felt, corrugated paper, colored tape, sequins - in our publication.
Classic and modular origami for New Year's decor
If you definitely want to try your hand and make a catchy craft for the holiday, then you should learn how to make origami modules according to a simple scheme. From small modules of different colors, crafts of large size and any shape are created.
In addition to modular crafts, there are many interesting ways to fold paper and get memorable volumetric products.
Figures of New Year's origami
Assembling modular origami is a simple task, whether it is a flower, a Christmas tree or a New Year's toy. The most important thing is to prepare a large number of multi-colored modules.

Christmas tree in modular origami technique. Master class with step by step photos
Seyitmedova Oksana Seytievna, teacher, Gymnasium No. 1503
Material Description: This material will be useful to educators, teachers of additional education, parents.
Target:
Making crafts using the modular origami technique.
Tasks:
- get acquainted with the technique of "modular origami";
- to consolidate the skills of working with paper, scissors, glue;
- learn how to fold triangular modules;
- connect modules in different ways.
Rules for safe work with scissors
1. Keep order in your workplace.
2. Before work, check the serviceability of the tools.
3. Do not work with loose scissors.
4. Work only with a serviceable tool: well-adjusted and sharpened scissors.
5. Use scissors only at your workplace.
6. Watch the movement of the blades as you work.
7. Put the scissors with the rings towards you.
8. Feed scissors rings forward.
9. Don't leave scissors open.
10. Store your scissors in their sheath with the blades down.
11. Do not play with scissors, do not bring scissors to your face.
12. Use scissors for their intended purpose.
Rules for safe work with glue
1. When working with glue, use a brush if necessary.
2. Take the amount of glue that is required to complete the work at this stage.
3. Remove excess glue with a soft cloth or napkin, gently pressing it.
4. Wash the brush and hands well with soap after work.
For work we need:
-glue,
-scissors,
- colored paper,
- eggplant lid
- bamboo skewer

Preparing modules.
Cut an A4 sheet into 16 rectangles.
We begin to fold the module.
Fold the rectangle in half.


Fold again to mark the middle line.
Fold one edge to the middle, then the other edge.


Turn over and fold the outer corners as shown in the photo.


Fold the top edge with the two folded corners to form a triangle.

The module is ready.
We make the first tier, the first and second row of eight pieces of modules. We put one module on the short side and put it in the pockets of the other two modules.

Next, we make the second tier, three rows of ten pieces of modules.

Then we put on five modules through one module.


After we make the third tier, four rows of twelve pieces of modules.


Then we put on six modules through one module.

Now we make the fourth tier, three rows of fourteen pieces of modules.

Then we put on seven modules through one module.


We make a blank of five modules, we need to make seven pieces, and dress them.


It remains to make the lower tier, three rows of sixteen pieces of modules.


Then we put on eight modules through one module.


We make a blank of seven modules, we need to make eight pieces, and dress them.


Make a hole in the middle of the eggplant lid, insert a bamboo skewer, the base for the Christmas tree is ready.


We collect the Christmas tree tier by tier.


Print the star template on the printer, glue the parts together.
- Module - DIY brick
- Christmas tree
- Swallow and crane
Origami
What is origami?
Origami is the name of the Japanese art of paper folding, derived from the Japanese "oru" (to fold) and "kami" (paper). Despite the fact that paper itself appeared in China, it was in Japan that they guessed to put figures of amazing beauty out of it. And the first such figurines appeared in Japanese monasteries, because in Japanese the concepts of the word “God” and “Paper” sound the same, although they are written in different hieroglyphs. Paper figurines had a symbolic meaning and were used in various rituals. In the Middle Ages, when the cost of paper fell, the art of folding penetrated the life of the nobility - it penetrated the life of the samurai. In the old days, the ability of a nobleman to entertain his lady by folding paper figures was considered a sign of good upbringing.
Nowadays, origami is used by different groups of people: artists use origami as a way to express themselves creatively, scientists, architects and mathematicians explore origami geometry for beauty or practical applications, doctors and teachers use origami to help their patients recover from illness or for educational purposes. . But a huge number of people fold paper just because it's fun.
Occupation of origami does not require special devices, an equipped workplace. Origami requires only a piece of paper, which makes it one of the most accessible arts - anyone can fold origami figures anywhere and in any situation: at home, in the hospital, on the train, while traveling, in the office and so on!
Positive aspects of origami art
As already mentioned, to practice classic origami, you do not need any devices, you only need a sheet of paper.
Origami is a unique opportunity to develop fine motor skills (motor functions of the human body, combining biochemical, physiological and psychological systems), which is especially important when raising children for the development of intelligence.
Origami is one of the areas of art therapy - the possibility of providing psychological assistance to the patient through art.
Origami is an ideal didactic game that develops imagination and ingenuity, logic and spatial thinking, imagination and intelligence. The spatial transformation of a flat sheet makes it easy to master complex mathematical concepts, solve geometry problems in the form of a game.
Origami is able to influence the emotional sphere of a person. This is especially important for those who have various communication problems, who are shy or, on the contrary, overly aggressive. In other words, for people who find it difficult to start communicating, group origami is suitable - each person in the group collects a certain part of the figure, after which the group connects all the parts together. Naturally, without interaction between group members, the craft will turn out to be ugly, or the parts simply simply won’t fit together. For quick-tempered people, on the contrary, an individual origami is suitable - it will help a person to escape from problems and plunge into the world of creativity, calm their nerves. The finished craft will delight not only the one who assembled it, but also colleagues!
How to start collecting origami crafts?
Many origamists like to fold animal models, as well as all kinds of wildlife. In addition to animal models, models of almost all physical objects have been created, including people, faces, plants, vehicles, buildings, and others. Some origami artists build abstract or mathematical shapes, others specialize in modular origami, where many simple parts are assembled into large complex structures.
There are several varieties of origami, but two of them are most suitable for short breaks of an office worker: folding according to the scheme and modular origami.
Folding according to the scheme is one of the types of origami diagrams, which is a step-by-step instruction that displays each stage of converting a sheet of paper.
Modular origami is a style of origami in which a whole figure is assembled from many identical parts - modules. Sometimes this style of origami is called 3D origami. Each module is folded according to the rules of classical origami from one sheet of paper, and then the modules are connected by inserting them into each other, the friction force that appears in this case does not allow the structure to fall apart.
In order to try your hand at origami, ordinary office paper with a density of 70-90 g / m² is suitable. For your experiments, you can even take drafts - working copies of documents that are thrown away.
modular origami
Module - DIY brick
As mentioned above, modular origami (3D origami) is an origami style in which the craft is assembled from many identical parts - modules. So, let's start assembling the module itself!
A 3D origami blank is assembled from a sheet with an aspect ratio of 2:1, for example, with dimensions of 8cm x 4cm. The module is a triangle with a double pocket and two tails. The order of assembly of the workpiece is shown in the diagram.
The blanks are interconnected according to the schemes for assembling crafts. Usually, the ends of one blank are inserted into the pockets of neighboring modules - this is how all parts are fastened, but other types of fastening are sometimes used. The symbols used in the diagrams are shown in the figure. And the video shows the assembly process of one module.

Christmas tree
To assemble the Christmas tree shown in the figure, 325 modules are required. The craft consists of 6 tiers, put on a paper tube. For greater strength, the modules are glued together (glue is dripped onto the wings of the blanks, after which they are inserted into the pockets of neighboring modules).

Swallow and crane


To assemble the swallow or crane shown in the figure, 85 modules are required.


External links
Section of external links, that is, links to other sites to which this resource has nothing to do. These links are provided for the convenience of users and do not mean that the owner of the site SysEngineering.ru approves the content of the sites listed below. In addition, the owner of the site SysEngineering.ru is not responsible for the availability of these resources and for their content.
The easiest way to decorate your home for the New Year holidays is to decorate it with DIY decor. Affordable, but no less spectacular New Year's paper toys can be made by the whole family. The process of their creation is so exciting and diverse that no one will be bored, and everyone will be satisfied with the result.
There are many techniques for making original paper decorations, and everyone can find the right one using ready-made patterns and templates.
Origami and kirigami
origami stars

You can make modular origami, such decorations are more difficult to manufacture, but also more effective. The principle is as follows: from paper of a small format, optionally in different colors, the same parts are folded in the right amount. Modular elements are interconnected and form various forms. From the same modules, completely different decorations are obtained.
Having mastered modular origami, you can try your hand at creating kusuda - original volumetric paper balls.

Modular elements, each of which is already an ornament in itself, are added according to the following scheme:

Modular origami can be the basis for creating flowers, snowflakes and other decorations, as in the diagram below.

From modular elements it will be possible to make a New Year's wreath, which is then decorated with sparkles, ribbons or bells.
Kirigami schemes
For work you will need:
The scheme is transferred to paper with a pencil. With a sharp knife or nail scissors, carefully cut through all the necessary details, removing excess.


By analogy with the previous decorations, snowflakes are made, only the sheet is pre-folded several times, and the stencil is superimposed on one part.
Exclusive paper decorations
Ice cream
To make cups, you need to cut out even circles from craft paper and cut each in half. Roll the semicircle into a cone shape and glue along the seam.
bells
It is better to cut out from whatman paper or cardboard. Glue the bell along the side seam and from below. If white paper was used, then painting the toy would be appropriate, and colored cardboard can be decorated with paillettes, sparkles or appliqués. Pass a ribbon or decorative cord decorated with beads through the loop.
diamonds
Along the fold lines (indicated by a dotted line), using a ruler, walk with a needle to avoid further creases. After that, you can begin to fold the diamonds, gluing the side seam at the end.

Garlands
From colored cardboard we cut out many circles of different sizes. For this, both ordinary and curly scissors are suitable. Elements are best done in different colors.
From the finished strips, single or multi-level garlands will come out.
Tips for choosing and working with material
- whatman paper and thin cardboard - for modular products;
- ordinary stationery of varying degrees of density is suitable for almost every type of toy;
- colored cardboard;
- kraft paper;
- design and packaging paper;
- corrugated colored paper.
Any paints are suitable for decorating finished paper toys: watercolor, acrylic, gouache.
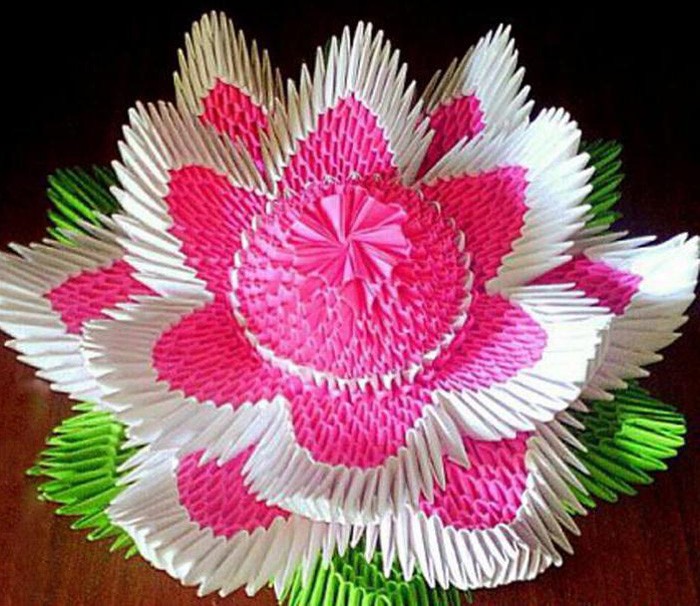
Another New Year's craft in the modular origami technique from Lyudmila Prishchenko. This work embodies an amazing combination of an element from the classic triangular modules and elements from the basic modules of the Sakura kusudama. The result is a fantastic blooming paper snowflake.

Christmas toy "Snow flowers"
This master class is intended for the leaders of the Origami circle and all lovers of modular origami. Such a toy can be hung on a Christmas tree, decorate the interior of a room, class, and also give it to relatives and friends.
Purpose: to teach how to fold a snowflake from triangular modules and simple flowers using the origami technique.
This work can be done by children 9-10 years old.
Modular origami is a type of origami in which products are made up of individual triangles (modules). Modules are connected by nesting them into each other. And when folding, the friction force does not allow them to fall apart, but glue can also be used.
To make a snowflake, we need to prepare 444 white modules.
We begin to collect 1 and 2 rows. We take two triangles (hereinafter we will say modules) and put one triangle (module) on adjacent corners. This is clearly visible in the photo:

We collect the same number of modules in the 1st and 2nd row.
1 row - 6 modules 2 row - 6 modules

In the next row you need to add 6 modules. We put on a module for each corner of the module. In total, in the 3rd row you get 12 modules. This is also clearly visible in the photo.

In the 4th row we put on the modules in the same way as in the 2nd row: we put on 1 module on 2 adjacent corners.

In the 5th row we add 12 modules, as in the 3rd row, and we get 24 modules in the row.

In the 6th row we put on 24 modules.
In the 7th row we add 24 modules, and we get 48 modules.

We won't add more. Let's just enlarge our snowflake. To do this, we will collect 3 rows of 48 modules, that is, row 8 - 48 modules, row 9 - 48 modules, row 10 - 48 modules.

The basis for the snowflake is ready. Now we make the rays of the snowflake. There will be 8 of them. Each ray starts with 6 modules. And the ray is assembled according to the following principle: 6 - 5 - 4 - 3 - 2 - 1.
Got 1 beam.

We also collect the remaining 7 rays. And the snowflake is ready.

Now let's start making flowers. For 3 flowers we need 15 squares 9x9 cm blue.
Take a square and fold it diagonally.

Raise the lower corners to the upper corner.
Hello dear masters and craftswomen. I present to your attention a master class on making such an origami swan, and I called it “Swan in Pink”. How to make an origami swan? We will make a pink drawing, highlight the swan with pink modules around the perimeter and put it on a round stand, and also glue small eyes. Please watch this video on making an origami swan. AT […]
Hello dear masters and craftswomen! Today I bring to your attention a master class on making a tricolor Swan from triangular modules. It would seem, what else can you think of, what other options are there for making Swans using the modular origami technique. But it turns out that there are still options and this is not the last thing in my arsenal. The tricolor swan is so simple […]
Hello dear masters and craftswomen! I bring to your attention a new master class on making a Swan in black from 3D modules. In the last lesson, we made a Swan in red, and now I decided to change the style a bit and make a Swan in black. The scheme is not complicated and will suit anyone, even a beginner in modular origami. Specially […]
Hello dear masters and craftswomen! I bring to your attention a new master class on making a Swan in red shades. On the Internet, you can find a huge number of different schemes and master classes for making Swans using the modular origami technique. I am sure that you have never seen such a swan. This scheme is quite simple and even […]
Swan in blue. Video tutorials and diagram. Part 3. In the third part of the master class, I offer you two video tutorials and a detailed origami diagram of how to make a swan. The first video shows how to make a swan neck and how to make a small stand. The second video talks about how to glue a swan better and faster. Lesson 6 (neck and […]
Swan in blue. Video tutorials and diagram. Part 2. In the second part of the "Swans in Blue" mater class, we complete the torso. I have prepared for you two video tutorials and a detailed origami swan diagram from modules. To assemble the swan, you will need 1438 1/16 size modules, of which: 317 - purple modules 471 - blue modules 552 - blue […]
Swan in blue. Video tutorials and diagram. Part 1. I bring to your attention a new master class on making an origami paper swan from 3D origami modules. The scheme is rather unusual and the appearance of the wing is not quite classic. In the photo you can see small through holes and a mesh pattern. Frankly, the scheme is quite complicated! Especially for this scheme, I […]
“Rainbow Swan” scheme and video tutorials (part 3). The third part of the "Rainbow Swan" master class consists of three video tutorials on assembling the stand. And I also decided that a video tutorial on gluing the "Rainbow Swan" would be very useful to you. Lesson 5 (stand part 1) Lesson 6 (stand part 2) Lesson 7 (stand part 3) […]
This fascinating technique - creating three-dimensional figures from triangular origami modules - was invented in China. The whole figure is assembled from many identical parts (modules). Each module is folded according to the rules of classic origami from one sheet of paper, and then the modules are connected by nesting them into each other. The friction force that appears in this case does not allow the structure to fall apart; you can assemble it without glue (if you are not going to use it as a toy).
Christmas tree from modules
For the Christmas tree, you can take modules of one or two colors. Here, modules from rectangles measuring 38x60 mm were used. But there may be other sizes. For this Christmas tree, 637 modules were needed (391 dark green, 246 light green). Fold the triangular modules according to the scheme. 
Santa Claus from modules
Prepare for work 242 white modules, 181 blue, 19 pink and 1 red.

Do-it-yourself New Year's Goby from modules
Bullock will need 372 white modules, 238 red and 74 black. The module is assembled according to the scheme Triangular origami module. 
Snowman from modules
Prepare triangular modules. In our snowman, we used 946 white and 176 colored modules, it turned out to be quite large. But you can make a snowman and smaller sizes.